| Line 400: | Line 400: | ||
*Other Weapons: M1911, M1 Carbine, Thompson, Sieg M1946, BAR, Springfield 1903 Sniper, Winchester M1897, M9 Bazooka, M2 Flamethrower |
*Other Weapons: M1911, M1 Carbine, Thompson, Sieg M1946, BAR, Springfield 1903 Sniper, Winchester M1897, M9 Bazooka, M2 Flamethrower |
||
*Staring Vehicle: LVT 75mm Howitzer |
*Staring Vehicle: LVT 75mm Howitzer |
||
| − | *Friendly Vehicles: M4 Sherman, DUKW, LVT (various models), F8F Bearcat, B-29 Superfortress, various warships |
+ | *Friendly Vehicles: M4 Sherman, DUKW, LVT (various models), F8F Bearcat, P-51 Mustang, B-29 Superfortress, F80 Shooting Star, various warships |
*Enemy Vehicles: Chi-Ha tank, Chi-Nu tank, OI tank, A6M Zero, J7W Shinden, D4Y "Judy", Nakajima Kikka, MXY Ohka, Shinyo Suicide boat |
*Enemy Vehicles: Chi-Ha tank, Chi-Nu tank, OI tank, A6M Zero, J7W Shinden, D4Y "Judy", Nakajima Kikka, MXY Ohka, Shinyo Suicide boat |
||
*Objectives: |
*Objectives: |
||
| Line 438: | Line 438: | ||
*Starting Weapons: Thompson SMG, Winchester M12, Mark II Frag Grenades, machete |
*Starting Weapons: Thompson SMG, Winchester M12, Mark II Frag Grenades, machete |
||
*Enemy Weapons: Nambu Pistol, Nambu Sword-Pistol, Arisaka Type 38, Type 4 Rifle, Type 100 SMG, Experimental Model 2 SMG, Type 99 LMG, bayonet, Shin-Gunto, Type 99 Grenade, Type 92 HMG (mounted), Type-2 aircraft machine gun (mounted) |
*Enemy Weapons: Nambu Pistol, Nambu Sword-Pistol, Arisaka Type 38, Type 4 Rifle, Type 100 SMG, Experimental Model 2 SMG, Type 99 LMG, bayonet, Shin-Gunto, Type 99 Grenade, Type 92 HMG (mounted), Type-2 aircraft machine gun (mounted) |
||
| − | *Other Weapons: M1 Garand, M2 Carbine, M3 Grease Gun, BAR, Sieg M1946, Winchester M1897, Browning Auto-5, M2 Flamethrower, M1919 LMG, Satchel Charge, |
+ | *Other Weapons: M1 Garand, M2 Carbine, M3 Grease Gun, BAR, Sieg M1946, Winchester M1897, Browning Auto-5, M2 Flamethrower, M1919 LMG, Satchel Charge, |
*Staring Vehicle: N/A |
*Staring Vehicle: N/A |
||
*Friendly Vehicles:N/A |
*Friendly Vehicles:N/A |
||
| Line 452: | Line 452: | ||
===Road to Tokyo=== |
===Road to Tokyo=== |
||
| − | *Location: |
+ | *Location: Kanagawa, Japan, April, 1946 |
| + | *Starting Weapons: Thompson, M1 Garand, Mark II Frag Grenades, machete, M9 Bazooka |
||
| + | *Enemy Weapons: Nambu Pistol, Arisaka Type 38, Type 4 Rifle, Type 100 SMG, Experimental Model 2 SMG, Type 99 LMG, bayonet, Shin-Gunto, Type 99 Grenade, Type 92 HMG (mounted), Type 4 AT Rocket Launcher, AT Gun, |
||
| + | *Other Weapons: M2 Carbine, M3 Grease Gun, BAR, Model 45A, Winchester M12, Browning Auto-5,M2 Flamethrower, M1919 LMG, Satchel Charge, |
||
| + | *Staring Vehicle: N/A |
||
| + | *Friendly Vehicles:N/A |
||
| + | *Enemy Vehicles: |
||
===Heart of the Empire=== |
===Heart of the Empire=== |
||
*Location: Chiyoda, Tokyo, Japan, May, 1946 |
*Location: Chiyoda, Tokyo, Japan, May, 1946 |
||
| + | *Starting Weapons: Sieg M1946, M1C Garand Sniper, Mark II Frag Grenades, machete, M9 Bazooka |
||
| + | *Enemy Weapons: Nambu Pistol, Arisaka Type 38 (Infantry, Sniper), Type 4 Rifle, Type 100 SMG, Experimental Model 2 SMG, Type 99 LMG, bayonet, Shin-Gunto, Type 99 Grenade, Type 92 HMG (mounted), Type 4 AT Rocket Launcher, AT Gun, Lunge Mine |
||
| + | *Other Weapons: M1911, M2 Carbine, M1 Garand Infantry, M3 Grease Gun, BAR, Model 45A, Springfield M1903, Winchester M12, Browning Auto-5, M2 Flamethrower, M1919 LMG, Satchel Charge |
||
| + | *Staring Vehicle: N/A |
||
| + | *Friendly Vehicles: M4 Sherman Tank, M26 Pershing Heavy Tank |
||
| + | *Enemy Vehicles: Ha-Go tank, Chi-Nu tank, O-I tank |
||
| + | *Objectives: |
||
| + | **Capture the Japanese Imperial Diet Building |
||
| + | **Capture Hibiya Park |
||
| + | **Destroy the counterattacking tanks |
||
| + | **Secure and Enter the Sakurada-mon Gate |
||
| + | **Survive the Banzai Charge |
||
| + | **Secure and Enter the Niju-Bashi Gate |
||
| + | **Clear the Imperial Palace |
||
| + | **Cross the inner moat |
||
| + | **Capture Edo Castle |
||
| + | *Bonus Objectives: |
||
| + | **Destroy the AT guns at the Diet before they can destroy a friendly tank (Codex: The Japanese Diet) |
||
| + | **Destroy the AT guns at the Sakurada-mon Gate before they can destroy a friendly tanks (The Emperor during World War II) |
||
| + | |||
| + | A cutscene described the US force's attack on Tokyo itself, weeks of bloody street-to-street fighting the ruins of the city. Finally, on the anniversary of the fall of Berlin, the US troops stand poised to take what remains of the Imperial Diet and Palace. While the Emperor and the top brass of the military had by this point fled to the north, the fall of the Palace would be a severe blow to Japanese Morale. Standing in their way are fanatically loyal defenders with orders to defend to the last man, and the will to carry out those orders to their last breath. The player starts out in the streets near the rear entrance of the Diet building, where they will advance under the support of Sherman and Pershing tanks, opposed by Japanese infantry, emplaced guns, and a couple Chi-Nu tanks. After clearing the defenses of the exterior of the diet, the player will be directed to enter the building, where they will have to fight through a series of interior rooms on three floors in heavy close-quarters combat. After clearing the Diet building, the player will continue, supported by armor and friendly infantry to attack the Japanese defenses at Hibiya park. After clearing the defense, a Japanese force of infantry and armor will counterattack, led by an O-I heavy tanks, which will make its presence known when it destroys the lead Pershing of the column with its gun. The player must hold off this force, attacking the tanks with their Bazooka or one of the many anti-tank guns and Type-4 rocket launchers in the park. After holding off the counterattack, the player and Allied troops advance on the Sakurada gate of the Imperial Palace, where the player must eliminate AT gun crews, machine gunners, and snipers on top of the gate, before crossing the bridge into the outer gardens of the Imperial Palace. Once they enter the outer gardens, a force of Japanese troops will launch a Banzai charge across the Nijubashi bridge supported by AT guns and machine guns on the inner gate, as well as a tank. The player must hold off the charging IJA infantry, who include suicide bombers with pole mines, while also contending with the supporting guns on top of the Gate. After clearing the second gate and crossing the Niju-bashi bridge, the player will be met with a second close-quarters combat section in the interior of the Imperial Palace buildings. After clearing the palace, the player will be met with a third moat and defended gate and bridge, leading to the east gardens and the ruins of Edo Castle. At Edo Castle, the player will be faced with clearing a series of gardens and buildings, before reaching the remains of the castle itself, defended by machine gun nests and snipers. Upon reaching the top of the ruins and eliminating all defenders, a cutscene will play and the level end. |
||
===The Bitter End=== |
===The Bitter End=== |
||
| + | *Location: Near Mount Nikko-Shirane, May, 1947 |
||
| + | *Starting Weapons: Model 45A, Thompson, Mark II Frag Grenades, machete, rifle grenade |
||
| + | *Enemy Weapons: Nambu Pistol, Arisaka Type 38 (Infantry, Sniper), Type 4 Rifle, Type 100 SMG, Experimental Model 2 SMG, Type 99 LMG, captured US weapons, bayonet, Shin-Gunto, Type 99 Grenade, Type 92 HMG (mounted), Type 4 AT Rocket Launcher, AT Gun, Lunge Mine, AT Mine |
||
| + | *Other Weapons: M1911, M2 Carbine, M1 Garand, Springfield M1903 (Sniper), M3 Grease Gun, BAR, Sieg M1946, Winchester M12, Browning Auto-5, M9 Bazooka, M2 Flamethrower, M1919 LMG, Satchel Charge |
||
| + | *Staring Vehicle: N/A |
||
| + | *Friendly Vehicles: Jeep, 2.5 ton truck, M3 Half-Track, M8 Greyhound, M4 Sherman Tank, P-51 Mustang |
||
| + | *Enemy Vehicles: |
||
==From the North== |
==From the North== |
||
Revision as of 00:51, 24 March 2018
The War That Never Was is a first person shooter in the Battlefield series based on multiple World War II alternate history scenarios based on cancelled operations of the Second World War, including Operation Sea Lion, Operation Tannenbaum, and Operation Downfall.
Single Player
BF1: The War that Never Was is divided into "War Stories" similar to Battlefield 1, based off different alternate scenarios.
We Shall Fight Them...
- Alternate Timeline: Operation Sea Lion
- Time Period: 1941-1942
- Player character: Sgt. Daniel Edwards, British Home Guard
- Intro:
On the Beaches
- Location: Dover, UK, April 1941
- Starting Weapons: Mauser C96, Ross Rifle, Wrench, Mills Bomb, Combat Knife
- Other Usable Weapons: Lee-Enfield, Webley Revolver, Howell Automatic Rifle, Thompson SMG, Mills Bomb, Coastal Gun Battery
- Enemy Weapons: Luger P08, Kar. 98K, Kar 98k sniper, MP40, MG-34, Flammenwerfer 40, Stielhandgranate
- Starting Vehicle: Armadillo Armored Truck
- Enemy Vehicles: Landing Craft, Tank Landing Barge, E-boat, Panzer II, Panzer 38t, Panzer IV, Me-109, Ju-87 Stuka, Destroyer
- Objectives:
- Defend the Beach
- Investigate the Coastal Gun Battery
- Eliminate the Fallscrimsjager Squad
- Defend the Coastal Battery
- Man the Coastal Battery
- Sink the Destroyer
- Optional Objectives:
- Destroy five Schwimmpanzer before they wade ashore (Codex: Schwimmpanzer)
- Shoot down a German aircraft (Codex: Battle of Britain)
The level begins with a cutscene in which Edwards briefly describes his history as a former tank driver and veteran of the Royal Tank Corps in the First World War, with a series of scenes from Battlefield 1 (yes, this is THAT Edwards), before switching POV to an older Edwards as a member of the British Home Guard, assigned to crew an Armadillo armored truck. Edward's vehicle is seen patrolling on a road along the Dover shore, atop the famous White Cliffs, when shells start raining down, German aircraft fly overhead, fleets of landing craft appear on the shore, and Schwimmpanzers wade ashore. From here, the player gains control of the Armadillo, and is tasked with firing the 37mm gun down at incoming landing craft, Panzers and infantry. Occasionally, the player will be assigned to move up and down to coast to defend different sectors of the beach. After defending three different sectors, a British officer will inform Edwards that they have lost contact with a coastal artillery position, and assigns Edwards and a group of Army and Home Guard troops to investigate. As the player drives to the position, the Armadillo is hit by a Stuka strike, but Edwards survives, crawling out of the vehicle and drawing the Mauser C96 sidearm he carried since his service in WWI. The player regains control of Edwards and can grab a Howell Automatic Rifle from near the destroyed Armadillo if they so desire, and walks to the coastal battery. The gun crew is dead and the battery is held by a squad of German Fallscrimsjager. As soon as the player fires the first shot, the rest of the squad will join the attack. Once the battery is taken, the player is forced to defend it from more attacking German infantry, and may use a Kar 98K and/or an MG-34 in a German arms cache near the battery for that purpose. After repelling the infantry assault, the player will mount up on the coastal gun and use it to destroy incoming landing craft and tanks until a German destroyer appears and starts bombarding the coast, which the player must destroy. After sinking the destroyer, the level ends.
In the Fields
- Location: Fields North of Dover, UK, April 1941
- Starting Weapons: Suppressed Sten, Mauser C96, Wrench, Mills Bomb, Combat Knife
- Enemy Weapons: Luger P08, C96, Kar 98K, Gewehr 41, MP40, MG-34, Stielgranate
- Other Usable Weapons: Webley Revolver, Double Barrel Shotgun, Thompson SMG, Lee-Enfield, Ross Rifle, Lee-Enfield Sniper, Bren Gun, Boys Anti-Tank Rifle, Molotov Cocktail, TNT, Croft Pike
- Playable Vehicles: Matilda Tank, Panzer 38t, Panzer IV, Stug III
- Enemy Vehicles: Panzer II, Panzer 38t, Panzer IV, StuG III, Schwerer Panzerspahwagen, Hanomag Halftrack, Opel Blitz
- Objectives:
- Destroy the German Ammunition Depot
- Destroy the German Fuel Depot
- Destroy the German Motor Pool
- Eliminate the German Colonel
- Optional Objectives:
- Repair and take command of the damaged tank (Codex: The Home Guard)
- Destroy the German armored car patrols (Codex: The Flame Fougasse)
- Steal a German tank (Codex: German Tank Development)
- Kill the German Colonel with a melee weapon (Codex: Take One With You)
A cutscene shows how, after fighting most of the day, the Germans manage to establish a beachhead, and Edwards is separated from his unit in the chaos of battle. That night, Edwards remains separated from the British force. The cutscene then points out several major locations, including the ammo depot, fuel depot, and motor pool, as well as the command post where the German Colonel is based. The player is then given control of Edwards and given free reign to roam through the fields and villages of the area, and complete the objective any method the player chooses to, which may include stealth, repairing and taking command of a British Matilda tank that was disabled and had its commander killed, or even stealing an unmanned German tank and turning it against the Germans (the 38ts, Panzer IVs, and StuGs an all be stolen).
In the Streets
- Location: Near Westminster Bridge, London, May 1941
- Starting Weapons: Mauser C96, Sten SMG, Wrench, Mills Bomb, Knife
- Enemy Weapons: Luger P08, Walther P38, MP40, Kar 98k, Solothurn S-1000 AT rifle, Stielgranate, AT Grenade, PaK-40
- Other Available Weapons: Lee-Enfield, Thompson SMG, Bren Gun, Lewis Gun, Boys AT Rifle, Molotov Cocktail, Smith Gun
- Starting Vehicle: Matilda Tank
- Friendly Vehicles: Covenanter Tank, Matilda Tank, Armadillo Armored Truck
- Enemy Vehicles: Panzer II, Panzer 38t, Panzer IV, Hanomag Half Track, StuG III
- Objectives:
- Defend Elephant and Castle Station
- Defend the War Museum
- Defend Waterloo Station
- Defend The Houses of Parliament
- Blow the Bridge
- Optional Objectives:
- Collapse the Bridge while German vehicle is on it. (Codex: British Anti-Invasion Preparations)
- Destroy five German vehicles while outside a tank (with infantry weapons or a mounted Smith Gun) (Codex: British insurgency weapons).
The mission starts with Edwards at the command of a Matilda II tank, having been placed in charge of the vehicle to replace the high number of front-line British tankers lost in battle, manning the British lines in front of Elephant and Castle Underground Station, which the player will have to defend, fighting off infantry and armored attacks until prompted to retreat to the next objective. The player will repeat this two more time until they cross the Westminster Bridge are prompted to hold the Houses of Parliament until the the engineers lay the charges to blow the bridge. At this point, the engineer carrying the detonator is killed, requiring the player to either get out of the tank and detonate it, or shoot the charges on the bridge supports with the main gun, setting them off and collapsing the bridge.
In the Hills
- Locations: Cotswold Hills, East of Gloucester, November 1941
- Starting Weapons: Mauser C96, Sten SMG, Wrench, Mills Bomb, Combat Knife
- Enemy Weapons: Luger P08, Walther P38, MP40, Kar 98k, MG-34, Solothurn S/1000 AT rifle, AT Grenade, Flak 88, PaK-40
- Other Weapons: Webley Revolver, Colt M1911, Lee-Enfield, Ross Rifle, Howell Automatic Rifle, Thompson SMG, Bren Gun, Lewis Gun, Boys AT Rifle, Smith Gun, 2 pounder AT gun
- Starting Vehicle: Churchill Tank
- Friendly Vehicles: Universal Carrier, Armadillo, Covenanter Tank, Matilda Tank, M5 Stuart, Churchill, Spitfire,
- Enemy Vehicles: Panzer II, Panzer 38t, Panzer IV, Hanomag Half Track, StuG III, Schwerer Panzerspahwagen, Me-109, Ju-87 Stuka
- Objectives
- Hold the Ridgeline
- Counterattack
- Destroy all tanks in the village
- Destroy all AT guns in the village
- Take the Village
- Destroy the German Staging Area
After a cutscene describing the situation, with the Germans advance being slowed as they move further inland, with Churchill and other high-ranking officials escaping to Edinburgh, well behind the lines, which are holding in Central England south of Birmingham, and in the Cotswold Hills east of the Severn River. With the German advance halted, the British still hold multiple Atlantic ports in Wales, northern England, and Scotland, and the Kriegsmarine has failed to completely control the seas, meaning American Lend-Lease weapons are being delivered to the front lines, beginning to stem the tide. At this point, Edwards has upgraded from a Matilda to the relatively new Churchill infantry tank, which he starts the level operating. The player starts on ridge to the east of Gloucester (with the city and Severn River visible in the distance if the player looks to their rear). Here, the player will be tasked with holding off the German push towards the city, taking out Panzers, half tracks, and infantry advancing towards the ridgetop along with other British forces on the ridge. After holding the line for a period of time, the player will be ordered to counterattack along with the rest of the British Army. The first target of the advance is a village, which the player will be tasked with clearing of armor and anti-tank guns. After taking the village, the player will be tasked with pushing on to the German staging area and eliminating the defending forces, as well as destroying the German fuel and ammunition supply.
Never Surrender
- Location: Salisbury Plain, April, 1942
- Starting Weapons: Mauser C96, Sten SMG, Wrench, Mills Bomb, Combat Knife
- Enemy Weapons: Luger P08, Walther P38, MP40, Kar 98k, MG-34, Solothurn S/1000 AT rifle, AT Grenade, Flak 88, PaK-40
- Other Weapons: Webley Revolver, Colt M1911, Lee-Enfield, Ross Rifle, Howell Automatic Rifle, Thompson SMG, Bren Gun, Lewis Gun, Boys AT Rifle, Smith Gun, 2 pounder AT gun
- Starting Vehicle: Churchill Tank
- Playable Vehicles: TOG-2 prototype
- Friendly Vehicles: Universal Carrier, Armadillo, Covenanter Tank, Matilda Tank, M5 Stuart, Churchill, Spitfire, Halifax Bomber
- Enemy Vehicles: Panzer II, Panzer 38t, Panzer IV, Hanomag Half Track, StuG III, Schwerer Panzerspahwagen, Me-109, Ju-87 Stuka, Ju-88
- Objectives:
- Destroy the Flak 88s
- Breach the First German Line of Defense
- Breach the Second Line
- Recapture the Railway Depot
- Retake the Training Estate
- Retake the Airfield
- Secondary Objectives:
- Capture and use the TOG II prototype (Codex: The TOG-2)
The opening cutscene describes the British counterattack, beginning to push the Germans back, with Edward's unit advancing into Salisbury Plain to recapture a major British Army base. The player starts operating a Churchill tank, and is tasked with destroying a group of Flak 88s in an ambush position, before proceeding through two German lines of defense, at both of which, the player must destroy enemy armor, AT guns, and infantry guarding the lines, supported by British aircraft, which an also be seen fighting Luftwaffe aircraft based at a captured air base. After the second line of defense, one of the player's tank crew with note that they see something at a nearby structure that was once part of the training facility. If the player chooses to investigate, they will find a TOG-2 prototype tank, which they can can get in and operate. The final objectives consist of destroying German defense surrounding a railway depot, the British Army training estate, and an airfield.
Retake London
- Location: London, May, 1942
- Starting Weapons: Mauser C96, Sten SMG, Wrench, Mills Bomb, Combat Knife
- Enemy Weapons: Luger P08, Walther P38, MP40, Kar 98k, MG-42, Solothurn S/1000 AT rifle, AT Grenade, Rifle grenade Flak 88, PaK-40
- Other Weapons: Webley Revolver, Colt M1911, Lee-Enfield, Ross Rifle, Howell Automatic Rifle, Thompson SMG, Bren Gun, Lewis Gun, Boys AT Rifle, rifle grenade, Molotov Cocktail Smith Gun, 2 pounder AT gun
- Starting Vehicle: Churchill Tank
- Friendly Vehicles: Universal Carrier, Armadillo, Covenanter Tank, Matilda Tank, M4 Sherman, M5 Stuart, Churchill, Barge
- Enemy Vehicles: Panzer II, Panzer 38t, Panzer IV, Hanomag Half Track, StuG III, Schwerer Panzerspahwagen, E-boat
- Objectives:
- Recapture Buckingham Palace
- Recapture The Parliament Buildings
- Recapture Trafalgar Square
- Recapture Blackfriars Bridge
- Recapture the Tower of London
- Recapture the Docklands
- Cross the Thames
- Recapture the Greenwich Naval Observatory
- Secondary Objectives:
- Do not damage any major landmarks (Buckingham Palace, Parliament, Westminster Abbey, Nelson's Column, Tower of London, Greenwich Observatory) (Codex: Auxiliary Units)
- Sink a German E-boat in the River
A cutscene details the British advance on London. With the British troops entering the outskirts of the city, Edwards and his tank division are to spearhead the counterattack into the center of the city and capture a number of important landmarks in the city by eliminating German troops and remaining in the capture area similar to a Conquest capture point. The player's path takes them first to Buckingham Palace, and then to Westminster Abbey and the Parliament Building, where their path across the Thames is blocked by the destroyed Westminster Bridge. The player instead turns north and retakes Trafalgar Square and the (also destroyed) Blackfriars Bridge. After taking the Tower of London and finding the Tower Bridge also destroyed, the player is ordered to proceed to the London Docklands. After clearing the Docklands, barges will arrive to take the player across the River Thames, where they land near the Naval Observatory at Greenwich. After taking the Observatory, the level ends.
Back to the Sea
- Location: Dover, England, September, 1942
- Starting Weapons: Mauser C96, Sten SMG, Wrench, Mills Bomb, Combat Knife
- Enemy Weapons: Luger P08, Walther P38, MP40, Kar 98k, MG-42, Solothurn S/1000 AT rifle, AT Grenade, Rifle grenade Flak 88, PaK-40
- Other Weapons: Webley Revolver, Colt M1911, Lee-Enfield, Ross Rifle, Howell Automatic Rifle, Thompson SMG, Bren Gun, Lewis Gun, PIAT, rifle grenade, Molotov Cocktail Smith Gun, 2 pounder AT gun
- Staring Vehicle: Churchill tank, TOG-2 (after gotten in previous mission)
- Friendly Vehicles: M5 Stuart, M4 Sherman, Matilda, Churchill, Halifax, Spitfire
- Enemy Vehicles: Panzer II, Panzer 38t, Panzer IV, Hanomag Half Track, StuG III, Tiger I, E-boat, Destroyer
- Objectives:
- Seize the Crossroads
- Clear the High Street
- Lead the Assault on Dover Castle
- Destroy the Tiger tanks
- Seize the Port of Dover
- Secondary Objective:
- Destroy a Tiger on foot (Codex: British Anti-Tank Weapons)
- Sink the Destroyer (Codex: The Sea Lion Wargame)
The cutscene described how the British counterattack, with American support, has managed to push the Germans back to a small perimeter around Dover, in a "reverse Dunkirk" situation. In a last ditch effort to stem the British tide, the Germans have deployed their newest weapon, a heavy tank called the Tiger. The player will be given control of Edwards in his tank, advancing through the fields outside Dover towards a major German-held crossroads, the first objective. At this point, a cutscene will show the British tanks getting knocked out by the Tiger. At this point, the player regains control of the tank and has to destroy the Tiger and other tanks and AT guns occupying the crossroad. The player is then tasked with clearing the Dover High Street of German forces, before advancing on Dover Castle, where they will be required to destroy a second Tiger, as well as multiple anti-tank guns and machine gun nests on the wall, as well as the castle gate, allowing the British infantry to storm the castle. Finally, the player is to attack the Port of Dover itself, which is defended by three Tiger tanks, over a dozen other tanks, numerous infantry and gun positions, as well as pair of E-boats and a docked destroyer. The player must, with the help of the other British troops, including air support, destroy all of the smaller units and knock out the guns of the destroyer. After a short period of time, a Halifax bomber flies in and sinks the destroyer, however, the player can sink it with multiple shots from the main gun of their tank for a bonus objective. After the port is retaken, the mission is complete.
Surprise Attack
Surprise Attack
Retaliation
Cutting the Lifeline
David VS Goliath
Causa Belli
- Alternate Timeline: Operation Tannenbaum
- Player Character: Lt. Otto Bergmann, Swiss Air Force
Causa Belli is a the first war story of the Operation Tannenbaum campaign, taking place in an alternate history where the Swiss policy of shooting down German aircraft that violate Swiss neutrality triggers a retaliation by the Germans in 1941. The first campaign follows the Swiss Air Force pilot who made the kill that caused the war.
Violation of Neutrality
- Location: East of Basel, Switzerland, August 1941
- Player Vehicle: D-3800 Fighter
- Enemy Vehicles: Me-109
- Objectives:
- Destroy the target balloons
- Destroy bombing targets
- Intercept the Me-109
Essentially a flight tutorial mission, which has the player destroy several targets and make various aerial maneuvers, before encountering a German Me-109 violating Swiss air space and being directed to shoot it down.
Invasion
- Location: Basel, Switzerland, August, 1941
- Player Vehicle: D-3800 Fighter
- Player Weapons: MG and 20mm cannon (vehicle), bombs (vehicle)
- Enemy Vehicles: Me-109, Ju-87 Stuka, Ju-88, Ju-52 transport, Panzer 38t, Panzer IV, Hanomag half track, 20mm Flakvierling
- Friendly Vehicles: D-3800, Me-109, Panzer 38t, Renault R35, Artillery
- Objectives:
- Intercept the Ju-88 bombers
- Intercept the Stukas
- Intercept the paratrooper transports
- Destroy the armored columns
- Attack the Forward Staging Area
- Optional Objectives:
- Shoot down five fighters (Codex: Swiss Neutrality Enforcement in WWII)
After a cutscene describing the German declaration of war following the shooting down of the Me-109 and the start of Operation Tannenbaum, the player is given control of the D-3800 fighter flying over Basel. The player is tasked with engaging and destroying two waves of Ju-88 bombers, minimizing the amount of damage done to Swiss ground forces. After the destruction of the level bombers, a force of Stukas will attack the border fortifications and Swiss army units, which the player must also intercept, before finally destroying a force of Ju-52 transports loaded with paratroopers. Throughout the entire engagement, the player will be forced to contend with escorting Me-109 fighters. After holding off the air assault, the player is sent to attack incoming armored columns, which the player may destroy with their bombs or by strafing with their cannons. Finally, the player is tasked with flying into German airspace to destroy a German forward staging area. After destroying all targets in the staging area, the mission is complete.
Delaying Action
- Location: Ner Bern, Switzerland, September, 1941
- Player Vehicle: Potez 630 Fighter
- Enemy Vehicles: Me-109, Ju-88, Ju-87 Stuka, Panzer II, Panzer 38t, Panzer IV, Hanomag Half Track, Opel Blitz,
- Friendly Vehicles: Potez 630, D-3800, AA gun
- Objectives:
- Intercept the German Bombers
- Destroy the German Column at on the Western Pass
- Destroy the German Column in the Central Pass
- Destroy the German Column on the Eastern Road
- Intercept the Second Bomber Wave
- Defend the Evacuation Train
After a cutscene describing the German advance into Switzerland as well as the Swiss delaying actions in the Jura Mountains and the defense plan of evacuating the leaders from the capital of Bern into the fortresses in the Swiss Alps, the player is given control of Bergmann, who is now at the controls of a Potez 630 fighter-bomber flying over Bern. The first objective is to engage a flight of Ju-88 bombers flying in from the north and east. The player will be supported by a few Swiss D-3800 and Potez 630 aircraft. After destroying the bombers, the player will be tasked with destroying three incoming armored columns, one coming from the east over relatively flat ground, and two crossing passes in the Jura Mountains. For the three in the mountains, the player can use their bombs to trigger rock falls to destroy the German armor. After eliminating the incoming ground forces, the player will be directed back to Bern to destroy a second bomber waves, before they are directed to defend a train evacuating the Swiss leadership out of the city to the mountain fortresses to the south. The player will have to shoot down groups of incoming Stukas and Me-109s which attempt to bomb or strafe the train. After the train reaches its destination, a cutscene will show Bergmann landing his aircraft at a base in the Swiss Alps and taxiing into the a hangar constructed in a bunker carve into the mountain.
Over the Alps
- Location: Near St. Gotthard Pass, Switzerland, June, 1942
- Player Vehicle: Potez 630 Fighter
- Enemy Vehicles: Me-109, Ju-88, Ju-87 Stuka, Panzer II, Panzer 38t, Panzer IV, Hanomag Half Track, Opel Blitz, Patrol Boat, Barge
- Friendly Vehicles: Potez 630, D-3800, AA gun
- Objectives:
- Defend the Airfield
- Defend the Artillery Batteries
- Destroy the Second Bomber Wave
- Attack the German column advancing on Engelberg
- Destroy the Boats on Lake Lucerne
The opening cutscene describes how much of the Swiss Army retreated to their fortifications in the mountains where they have thus far held out against the Germans in their bunkers. In summer, 1942, the Germans launched a renewed offensive to take back to attack the Swiss holdouts in the mountains. The player is given control of Bergmann, who has launched his Potez 630 from an airfield with a hangar built into a mountain. The player must first defend the airfield from flights of Stukas and Ju-88s that attack from the north, as well as contending with the escorting fighters. After protecting the airfield, the player is directed to defend a number of fortified artillery positions from Stuka attack. After the intercepting the Stukas, a second wave of German bombers with escorts will arrive from the north, which the player will be tasked with shooting down. After these are dealt with, the final objectives will be to assist ground forces with the German ground force advancing on two town mountain towns where the Swiss are still holding out. To do this, the player must destroy a column of tanks and troops transports advancing up the valley to Engelberg, and then destroy a number barges carrying German equipment across Lake Lucerne to Altdorf (the Swiss having blown the tunnels on both land routes through the lake). After sinking the barges, a cutscene will play where Bergmann's aircraft is overwhelmed by several Me-109s and shot down, with Bergmann bailing out over the Alps.
Clipped Wings
- Location: Haldi-Schattdorf, Swiss Alps, June, 1942
- Starting Weapons: Luger P08, Survival Knife
- Enemy Weapons: Walther P38, Mauser C96, Kar 98K, Gewehr 41, G41 sniper, MP40, FG-42, Luftwaffe Drilling, Stielgranate, Solothurn S/1000
- Other Available Weapons: Swiss Degen, Schmidt M1886, K-31, K-31 Sniper, Browning Auto-5, Double-Barrel Shotgun, Lmg-25, Dynamite, Pickaxe
- Enemy Vehicles: Panzer II, Panzer 38t, Panzer IV, Hanomag Half Track, Opel Blitz, Kubelwagen, Schwehrer Panzerspahwagen
- Friendly Vehicles: Universal Carrier, Militia Truck, Panzer 38t
- Playable Vehicles: Universal Carrier, Militia Truck, Motorcycle, Swiss Army Bicycle
- Objectives:
- Eliminate or Evade the German Alpine Patrol
- Assist the Militia at the Chalet
- Defend the Haldi Chapel
- Defend Haldi Village
- Ambush German Reinforcements on the north road
- Ambush German reinforcements on the south road
- Push the Germans off the Mountain
- Link Up with Swiss Army Forces
- Support the Counterattack
- Bonus Objectives:
- Kill an enemy while on a bicycle (Codex: Swiss Army Bicycles)
- Kill ten enemies with shotguns (Codex: Swiss Militia and Shooting Culture)
The cutscene describes how, in spite of the best efforts of the Swiss Army, the Germans managed to gain a foothold in Altdorf, however, they are meeting heavy resistance in the mountains, and must be supplied by lake, with Swiss patrols harassing German engineers making efforts to repair the tunnels. The player takes control of Bergmann on a mountainside where he was shot down, armed with a Luger P08 where German forces are battling with Swiss Army and militia forces. The player is first tasked with eliminating or evading a German patrol. This can be achieved in one of several ways- the player can simply shoot them, possibly taking a double-barrel shotgun and a Swiss degen short sword from a group of nearby chalets, or a Luftwaffe Drilling from the wreck of a downed Ju-88. Alternatively, the player can use the chalet or the wreckage to hide from the patrol, before continuing down the mountain, evading or eliminating German patrols until they reach a chalet defended by a group Swiss militia armed with various weapons. The player must then help defend the chalet, making use of weapons from an arms cache if they so desire. After the attack on the chalet is held off, the player must then go to the chapel in the mountain village of Haldi-Schattdorf, using a Swiss army bicycle if they so desire as transport. After defending the chapel from a second German attack, they must go to a third location further down the mountainside in the village. This time, they can take a motorcycle or a truck armed with a machine gun by the militia, and head downhill to the rest of the village to defend a position near the top of a ski lift. After pushing back the Germans from this position, the player will be tasked with ambushing German reinforcements, consisting of several trucks and half-tracks on the side of side of the mountain road. At the village, the player can take a Solothurn anti-tank rifle, dynamite, and/or anti-tank grenades for this purposes. The player will be directed to a position in the woods on either side of the road. There is a short pause before the convoy arrive, which the player can used to plant explosives on the road, detonating them as the convoy arrives. After destroying the convoy, the player is directed to join the militia and advance downhill to meet with the Swiss army outside of Altdorf. At this point, which the player is to join in their assault, which is led by several Swiss R-35 and 38t tanks. At this point, the player may choose to drive a Universal Carrier armed with an anti-tank rifle. The player will be required to destroy three German roadblocks supported, including Panzers, before pushing them back to the shores of Lake Lucerne and capturing the docks.
Counterattack
- Location: Near Bern, Switzerland, October, 1944
- Starting Weapons: K-31 Rifle, SIG MKMO, Stielgranate, Molotov Cocktail, Combat Knife
- Enemy Weapons: Walther P38, Luger PO8, Kar 98K, Gewehr 41, MP40, FG-42 scoped, STG-44, MG-42, Stielgranate, AT Grenade, Panzerschreck
- Other Available Weapons: Schmidt M1886, K-31 Sniper, Walther Toggle Action, Lmg-25, Satchel Charge, Molotov Cocktail
- Enemy Vehicles: Panzer IV, Tiger, Hanomag Half Track, Schwehrer Panzerspahwagen, Me-109 (grounded), Ju-88 (grounded), Me-262 (grounded)
- Friendly Vehicles: Armed Truck, Panzer 38t, Renault R-35, Panzer IV (captured), Nahkampfkanone 1
- Playable Vehicles: Armed truck (Solothurn AT rifle), Ju-88 (grounded, turret only)
- Objectives:
- Destroy the armored car patrol
- Eliminate the Panzerschreck squad
- Ambush the counterattacking tanks
- Secure Musingnen
- Secure the crossroads
- Destroy the airfield guard towers
- Destroy the Tiger
- Secure the airfield.
- Optional Objectives:
- Destroy the Tiger before it destroys the Nahkampfkanone (Codex: The Nahkampfkanone)
A cutscene describes the events in the two years of the alternate timeline skipped during the time skip. Specifically, the Swiss manage to repel any further German attacks into the Alps, their bunkers proving resistant to air attack and difficult to spot from the air, while the valleys funnel the German ground forces into predictable route, making for easy ambushes. By late 1944, the German presence in Switzerland is severely weakened, especially since the D-Day invasion of 1944, as the Germans draw their troops away to repel the Allied invasion in France as well as the advancing Soviets in the east. Because of this, the Swiss have managed to push the remaining Germans out of Lucerne, paving the way for retaking the capital of Bern. After the cutscene, the player gains control of Bergmann manning a Solothurn AT rifle mounted on the back of truck at the back of a Swiss Army column consisting of both Swiss vehicles as captured German panzers painted in Swiss colors. The player is required to use the weapon to destroy a recon patrol consisting of a few Schwehrer Panzerspahwagen and half tracks. Upon reaching the roadblock at the town of Musingnen, a Swiss Renault R35 advances on a pair of houses marking the end of the main street of town, only to be destroyed by a Panzershreck. The player is instructed to dismount and attack the houses on one of the two sides of the road on foot and take out the Panzerschreck squads in the buildings. After clearing the building, the player is instructed to take a Panzerschreck and turn the German's own weapons against them, destroying a pair of counterattacking Panzer IVs. After destroying the tanks, the player must clear the town of German infantry and then return to the truck. In one of the houses, the player can find a Walther Toggle Action shotgun in a guncase, which will help them clear the town. The column will continue moving, crossing a bridge before making its way to a crossroads leading to the airfield. A Nahkampfkanone will destroy a Panzer IV in a scripted event, before the player is instructed to clear the buildings and roadblock around the crossroads. The player may stay on the turret on the truck to fire on the building with the heavy gun if they wish before dismounting the finish off the rest of the Germans. After clearing the crossroads, the player will get on the truck again. As they near the entrance of the airfield, the player is required to destroy the guard towers with the mounted AT rifle. After destroying these, a Tiger tank will drive out from behind a hangar and take aim at the truck. The player will be promted to press the "exit vehicle" button and jump out of the truck before the tank fires. The player will be instructed to destroy the tank, and a Panzerschreck will be available in a nearby arms cache if they are out of ammo for the first one. If the player is quick enough, they can destroy the Tiger before it destroys the Nahkampfkanone, they can complete a bonus objective. After destroying the tank, the player must clear the airfield of enemy infantry. An MG-42 is available in the same arms cache as the Panzerschreck, making this job much easier. The player must clear the barracks, the control tower, and all the hangars to clear the airfield. The player will find a few parked Me-262 jets in the last hangar, completing the mission.
Back in the Sky
- Location: Geneva, Switzerland, December, 1944
- Starting Weapons: 4x 30mm cannon, 24x R4M rockets
- Player Vehicle: Me-262 (captured)
- Enemy Vehicles: Me-109, Ju-88, Ju-87 Stuka, Me-262, Panzer IV, STuG III, Wespe, Flakvierling, Flak 88
- Friendly Vehicles: D-3800, Potez 630, Panzer 38t, various panzers (captured),
- Objectives:
- Attack the airfield
- Destroy all German aircraft
- Destroy the Control tower
- Destroy the radar
- Eliminate the aerial reinforcements
- Destroy the German boats on Lake Geneva
- Destroy the dug-in tanks
- Destroy the anti-tank guns
- Destroy the German artillery battery
- Eliminate the Me-262 ace
- Eliminate all other aircraft
- Destroy the German headquarters
- Optional Objectives:
- Destroy all aircraft on the first airfield before they take off (Codex: Luftwaffe '46)
The mission begins with a cutscene describing the Swiss captured of the four Me-262s at the Bern airfield, as well as the next operation, to use one of the Me-262s to launch a surprise attack on an airfield near Geneva, presently the last pocket of German resistance in Switzerland, trapped between the Swiss and the Alps to the east and the Western Allies to the west. The player gains control of the aircraft flying over Lake Geneva, at which point the Germans will try to hail his aircraft on the radio. If the player moves in quick enough, they can destroy all aircraft at the airstrip before they take off and destroy the radar and control tower. If the player dawdles for too long, the Germans will realized their identity and start scrambling planes. After attacking the airfield, the Swiss Army forces advancing from the east will call upon them to destroy three targets slowing their advance into the city, a group of dug-in tanks, several anti-tank guns, a few gunboats on the lake, a battery of artillery. All of these targets can easily enough be destroyed with a few well-placed rockets. The player will then be directed to attack the German headquarters in the city, however, a flight of three Me-262s and several Me-109s will appear in the skies, led by a German ace pilot. The player must eliminate the ace and all other aircraft, as well as attack the HQ to end the mission and the "Causa Belli" war story.
Fleet of the Landlocked
- Location: Lake Geneva, Switzerland, August, 1941
- Starting Weapons: Solothurn S-1000 AT rifle, mounted machine gun (both mounted on boat)
- Enemy Weapons: Kar 98K, MP40, MG-34, Pak 40, Flak 88
- Other Usable Weapons: N/A
- Starting Vehicle: Type 41 Patrol Boat
- Enemy Vehicles: Landing Craft, Tank Landing Barge, Patrol Boat, Improvised Gunboat, Panzer 38t, Panzer II, Hanomag Half Track, Opel Blitz, Me-109, Ju-87 Stuka
- Friendly Vehicles: Type 41 Patrol Boat, D-3800
- Objectives:
- Shoot down the attacking Stukas
- Sink the Landing Barges
- Sink the Gunboat
- Attack the Panzer column on the shoreline road
- Secondary Objectives:
- Destroy five German patrol boats (Codex: Swiss Army Lake Flotilla)
The mission begins, introducing the player character as a member of the Swiss Army Lakes Flotilla manning a Type 41 Patrol Boat on Lake Geneva when the German invasion begins. As the sound of Stuka sirens fills the air, the player is given command of the boat, and is able to switch between the machine guns and the AT rifle. Using the MG (or potentially the AT rifle if they attack from the right angle), the player will be required to shoot down a group of four Stuka dive bombers attacking his and other patrol boats. After downing the Stukas, the player will then be instructed to attack a group of German landing vessels converted from barges and ferries making their way across the lake, escorted by German patrol boats. The barges can be sunk with a few shot with the AT rifle, while the patrol boats can be destroyed with a single shot. After sinking the barges, the player will be directed to sink a gunboat (also a converted ferry with mounted artillery) firing on the Swiss Army near Lausanne. After sinking the boat, the player will be directed to attack a German armored column on a shoreline road. After destroying the vehicles, the the player will complete the mission.
Crossroads
- Location: Lausanne, Switzerland, August, 1941
- Starting Weapons: K31 Rifle, Schmidt M1886,
- Enemy Weapons: Luger P08, Mauser C96, Kar 98K, MP40, Stielhandgranate, AT Grenade
- Other Usable Weapons: Luger P08 (suppressed), SIG MKMO, K31 Sniper, Lmg-25, Solothurn S/1000, Dynamite, AT Mines
- Enemy Vehicles: Panzer 38t, Panzer II, Panzer IV, Hanomag Half Track
- Friendly Vehicles: Panzer 38t
- Objectives:
- Get back to the Swiss Lines:
- Hold the Lausanne Cathedral
- Hold Chateau St. Marie
- Destroy the Panzer IV
- Optional Objectives:
- Destroy the patrolling Panzer II (Codex: Swiss Universal Service)
- Kill ten Germans with a sniper rifle: (Codex: The GP-11 round)
A cutscene will play showing a Stuka dropping a bomb, which detonated near the player character's boat with enough force to blow it in half. The player character, however, survives and is seen swimming ashore and climbing up a dock on Lausanne. After hearing the German soldiers talking, he takes cover in a dark alley and draws his Schmidt M1886 revolver. At this point, the player takes control. From here, the player must go through a semi-open world section of the level, with multiple potential paths through the level, either slipping past the German patrols using stealth or take a more aggressive route (though this much more difficult at higher difficulties. Depending on their routes, the player may travel through the streets, across or around a park, through houses, or even through the sewers. Multiple arms caches will be available, most with a suppressed weapon if the player chooses a stealth approach. Eventually, the player will have to get past a Panzer II patrolling near the railroad tracks. The player may sneak past by timing their movements, go under the street and tracks through an open manhole to the sewers, or destroy the tank in one of two ways- either they can enter a house at the end of the street, eliminate two Germans inside, and steal a Solothurn anti-tank rifle or AT grenades from the arms cache, or take some anti-tank mines from a crate next to a house and plant them in the path of the tank. After crossing the tracks, the player has only a few more blocks before they reach the Swiss lines near the Lausanne Cathedral, defended by a force of infantry, two mounted machine guns, and a Panzer 38t painted in Swiss colors. At this point, they will be instructed to aid in the defending against a German attack. Two arms caches are available in the area around the cathedral, one on the ground floor with an Lmg-25, SIG MKMO, grenades, dynamite, and AT mines, and inside the cathedral, by a window overlooking the front entrance, with a K-31 sniper and a Solothurn anti-tank rifle. In the short time before the attack, the player can place mines or dynamite near the entrance to the square if they wish to. Take up position in the square outside the cathedral or in the overlooking window and drive off the first wave of German attackers, consisting of infantry, a Hanomag half-track, a Panzer II, and a Panzer 38t. After the first assault is held off, the player will be ordered to the Chateau St. Marie, a castle located about a block to the north, where they are to take up position on a tower over looking the entrance and another square, where the second German wave will come from. This wave will be heavier, consisting of two half-tracks, two Panzer 38ts, and finally a Panzer IV. Thankfully, the arms cache on the tower has a Solothurn AT rifle and AT grenades giving the player all the anti-tank weapons they might need. After the Panzer IV is destroyed, the German wave will retreat and the level end.
Chokepoint
- Location: Chateau de Chillon, Switzerland, August, 1941
- Starting Weapons: K31 Sniper, SIG MKMO,
- Enemy Weapons: Luger P08, Mauser C96, Kar 98K, MP40, Stielhandgranate, AT Grenade
- Other Usable Weapons: Luger P08, SIG MKMO, K31 Rifle, Lmg-25, Solothurn S/1000, Satchel Charge, AT Mines, 20mm Oerlikon, 75mm Anti-tank gun
- Enemy Vehicles: Panzer 38t, Panzer II, Panzer IV, StuG III, Hanomag Half Track, Patrol Boat, Gunboat, Barge, Me-109, Ju-87 Stuka
- Friendly Vehicles: D-3800 Fighter, Panzer 38T, Renault R-35
- Objectives:
- Defend the Chateau de Chillon
- Destroy the incoming Stukas
- Destroy the attacking Boats
- Destroy the Landing Barges
- Destroy all disembarked forces
- Destroy the first ground assault
- Defend the Fort de Chillon
- Man the 75mm AT gun
- Repel the second assault
- Repel the final assault
- Optional Objectives:
- Destroy three German vehicles by triggering a rock slide (Codex: The National Redoubt)
- Sink the first wave of Landing Barges before they unload (Codex: Fort de Chillon)
After a cutscene describing the Swiss defense plan of delaying the enemy advance while they retreat to their fortresses in the Alps, the mission begins at the Chateau de Chillon, a castle on the shore of Lake Geneva south of Lausanne, with an artillery bunker on the mountainside across a narrow road between the lake and mountains. This position between the lake and the mountains allows it to act as a chokepoint for the German advance. The player is initially positioned on a tower in the castle overlooking the lake, and is ordered to man a 20mm Oerliken anti-aircraft gun mounted on top of the tower. The first target is a group of Stukas making a dive bombing run on the castles and nearby fort. After shooting them down, the Germans will attack using boats and barges escorted by patrol boats and a gunboat to unload infantry and vehicles south of the castle. Using the Oerliken gun, the player is to fire down on the boats- if they destroy all the landing barges before they unload, they will unlock a codex. After dispensing with the amphibious assault, The Germans will deploy a force of Panzers and half tracks to attack along the road. The player can use the Oerliken gun or an AT rifle on the tower to the east to take them out. The player will then be ordered to cross the road, going past a few Swiss Panzer 38ts and an R-35 tank holding the roadblock, and climb up to the Fort de Chillon to man the anti-tank gun. After manning the gun, two more waves of German armor will attack, the first being mostly lighter armor, while the last having more heavy vehicles such as Panzer IVs and STuGs. At any point, the player can shoot some loose rocks with the AT gun to send them falling down onto the column, and also blocking the path of further attacks until they can push or blast them aside. Destroy at least three vehicles in a rockslide for a codex. Once all three assaults are repelled, the level ends.
Hold the Fort
- Location: North of St. Maurice, Switzerland, September, 1941
Death From Above
- Location: Swiss Alps, West of Saanen, Switzerland, January, 1942
- Starting Weapons: K-31 Sniper, Luger P08, Stielgranate, Ice Axe
- Enemy Weapons: Luger P08, Mauser C96, Kar 98K (Infantry, Sniper), Gewehr 41 (Infantry, Sniper), MP40, MG-34, Flakvierling, FlaK 88
- Other Usable Weapons: SIG MKMO (Factory, Suppressed), Lmg-25, Double Barrel Shotgun, Walther Toggle Action, Solothurn AT rifle Satchel Charge, AT Grenade, MG81 Aircraft MG (mounted in Grounded Ju-88)
- Starting Vehicle: Skis
- Enemy Vehicles: Kubelwagen, Opel Blitz, Hanomag, Schwehrer Panzerspahwagen, Panzer 38t, Panzer IV, Me-109 (grounded), Stuka (grounded), Ju-88 (grounded)
- Friendly Vehicles: N/A
- Objectives:
- Clear the Ski Lodge Outpost
- Climb the Ice Wall
- Destroy the First Anti-Aircraft position
- Destroy the Second AA position
- Destroy the Final Anti-aircraft position
- Place the Explosives
- Trigger the Avalanche
- Ambush the Surviving Germans
- Sneak into Saanen Airfield
- Sabotage the Planes
- Eliminate the base commander
- Escape
The mission begins with the player character on a snow-covered mountainside, accompanied by a small squad of Swiss infantrymen, a few hundred meters from a German outpost in a former ski lodge. The player may clear this outpost in any number of ways, including sniping for a distance, silently eliminating the Germans with melee attacks and a suppressed MKMO hidden in the arms cache in a chalet next to the lodge, or a direct assault. After clearing the lodge, the player will be directed to an ice-covered cliff, which they will climb using a pair of ice axes (which also act as the melee weapon for this mission). After reaching the top of the cliff, the player will have to evade or eliminate a few patrolling Germans, before reaching the first AA outpost. The player can attack up the trail, though this is patrolled by German infantry, or climb another ice wall and sneak in from behind and clear the battery stealthily. As an "Easter egg" melee animation, if the player sneaks up on a German standing near a cliff and melees them, instead of the normal melee animation, they will push them off the cliff. After clearing the battery, the player must destroy the guns using explosives or even by mounting up on one of the guns and using it to shoot the others. The second AA battery lies across a narrow ridge from the first battery, while the third is located on a peak on the other side of a valley that the player must traverse. There are multiple locations where the player can use their ice axe for a tactical advantage to open up new routes of attack. After destroying all three AA batteries, the player will be directed to a patch of snow on a mountainside overlooking the road into the town of Saanen, where a German supply and armored convoy will enter the pass. The player must place explosives on the snow patch, before getting to a safe distance and detonating them, sending an avalanche down on the convoy, and if necessary, destroy any vehicles that survived with a provided anti-tank rifle. After the destruction of the convoy, a blizzard will blow in, allowing the player to easily sneak past a the patrolling Germans and descend into the valley to the town of Saanen. The player will be directed to climb down an ice wall and into an airfield in Saanen, where they must destroy all of the parked aircraft and eliminate the commanding officer of the airfield. This can be done using stealth, or a more direct attack, though this becomes more difficult at higher difficulties. After eliminating all of the targets, the player must escape up a path back into the mountains to complete the level.
One-Man Invasion
- Location: Near the Swiss Border, West of St. Gingolph, France, June, 1942
- Starting Weapons: K-31 Sniper, Welrod, Stielgranate, Ice Axe
- Enemy Weapons: Luger P08, Mauser C96 (Pistol, Suppressed Carbine, Auto), Kar 98K (Infantry, Sniper), Gewehr 41 (Infantry, Sniper), MP40
- Other Usable Weapons: SIG MKMO (Suppressed), Double Barrel Shotgun, Walther Toggle Action, Satchel Charge
- Starting Vehicle: N/A
- Enemy Vehicles:Kubelwagen, Opel Blitz, Hanomag, Panzer 38t, Panzer IV
- Friendly Vehicles: N/A
- Objectives:
- Eliminate or Evade the Germans at the Summit Observation Post
- Eliminate or Evade the Germans at the Ski Lift
- Eliminate or Evade the Germans at the Mountain Lodge
- Eliminate or Evade the Germans patrolling the forest
- Plant the Explosives over the Road
- Ambush the Convoy
- Eliminate the German Officer
- Escape
- Bonus Objectives:
- Reach the ambush point undetected (Codex: Insurgency Weapons of World War II).
A cutscene describes a second attempt by the Germans to dislodge the Swiss from their positions in the mountains in summer, 1942. A French resistance operative has informed the Swiss holed up in the fortress of Martingny of the timetable of a German commander in the operation's travel through St. Gingolph. The player is part of a team of Swiss and French Resistance forces making the trek through the Alps, across the border to the mountain above St Gingolph, on the south side of Lake Geneva to ambush the convoy. The player starts on a mountaintop armed with K-31 sniper rifle and Welrod suppressed pistol (provided by the French Resistance, who in turn were covertly supplied by the British). The player is to make their way along the a series of mountain ridges, either eliminating or evading German patrols and observation posts in the mountains, before making their way down the mountainside overlooking the road along the shore of Lake Geneva. At this point, the player must plant several explosive charges, before moving to a position about 100 meters to the west, where the player will observe the convoy with binoculars and locate the German officer. When prompted, the player is to detonate the charges, causing a rock slide to bury to the Panzer IV leading the convoy. After detonating the charges, the the player must kill the officer before the Germans locate them before retreating back up the mountainside and into the Alps, at which point the level ends.
Afloat Again
- Location: Lake Geneva, November, 1944
- Starting Weapons: Flak 88, Nebelwerfer, Flakvierling, multiple MG-42
- Enemy Weapons: various small arms, PaK 40, Flak 88
- Other Usable Weapons: N/A
- Starting Vehicle: Improvised Gunboat
- Enemy Vehicles:Hanomag, Panzer 38t, Panzer IV, Stuka, Me-109, Me-262, Patrol Boats, Improvised Gunboat
- Friendly Vehicles: D-3800, Potez 630, Type 41 Patrol Boat
- Objectives: A cutscene describes the weakening of German positions in Switzerland because of the combined pressure of the D-Day invasion and the Soviet advance in the east, allowing the Swiss to retake much of their territory. By late 1944, the last city in German control is Geneva, where the Germans are trapped between the Swiss and the Western Allies. The player is placed at the command of an improvised gunboat consisting of a ferry converted to carry multiple weapons, including a Flak 88 on the bow, a Nebelwerfer rocket launcher on the stern, and multiple machine guns and 20mm autocannons (controlled as one while switching to the "AA" weapon- when the trigger is pressed, all machine guns and autocannons will within traverse range will fire at the target).
First Island to Fall
Tanegashima
Olympic
Slopes of Sakurajima
To the Last Man
Downfall
- Player Character: Sgt. Thomas Campo, US Marine Corps
Beaches of Hiratsuka
- Location: Hiratsuka, Japan, 1946
- Starting Weapons: M1 Garand, Smith and Wesson Model 29, Mark II Frag Grenades, Rifle Grenade, KA-BAR,
- Enemy Weapons: Nambu Pistol, Arisaka Type 38, Type 4 Rifle, Type 100 SMG, Experimental Model 2 SMG, Type 99 LMG, Type 4 AT Rocket Launcher, AT guns, bayonet, Shin-Gunto
- Other Weapons: M1911, M1 Carbine, Thompson, Sieg M1946, BAR, Springfield 1903 Sniper, Winchester M1897, M9 Bazooka, M2 Flamethrower
- Staring Vehicle: LVT 75mm Howitzer
- Friendly Vehicles: M4 Sherman, DUKW, LVT (various models), F8F Bearcat, P-51 Mustang, B-29 Superfortress, F80 Shooting Star, various warships
- Enemy Vehicles: Chi-Ha tank, Chi-Nu tank, OI tank, A6M Zero, J7W Shinden, D4Y "Judy", Nakajima Kikka, MXY Ohka, Shinyo Suicide boat
- Objectives:
- Defend the LVT
- Destroy the Anti-tank positions
- Destroy the machine gun nests
- Capture the bunker
- Eliminate the AT rocket crews
- Destroy the counterattacking tanks
- Destroy the O-I tank
- Optional Objectives:
- Destroy all Kamikazes before they can attack (Codex: Kamikaze)
- Destroy all Shinyo Suicide Boats before they can attack (Codex: Shinyo Suicide Boat)
- Shoot down a Nakajima Kikka (Codex: German-Japanese Technology transfers)
A cutscene introduces the alternate timeline and Operation Coronet, the second phase of Operation Downfall, before showing a shot of the invasion fleet of Hiratsuka, before zooming in to Thomas Campo (the BFII "Isles of the Pacific war stories character), now a Sergeant, having been promoted during his tour of duty in the Pacific seated on the .50 cal mounted on top of the turret of an LVT "Water Buffalo" equipped with a 75mm howitzer for fire support. The player will gain control of Campo at this point, and have to use the .50 cal to defend against attacking Japanese forces, including aircraft, both conventional attack aircraft and kamikazes, as well as Shinyo suicide boat. After making it close to shore, the player will gain command of the entire LVT, and will be tasked with eliminating targets on the beach. The first targets they have to destroy are three anti-tank gun positions, followed by four machine gun nests pinning down troops on the beaches. After the all the defenses are destroyed, a cutscene where the LVT is hit by Japanese Type 4 anti-tank rocket, but Campo survives and crawls out of the destroyed vehicle. After the cutscene, the player is required to make their way up across the beach to the entrance to one of the bunker and clear the structure of enemies. When they reach the top floor, they will exit into the position where the Japanese troops with the rocket launchers are stationed. After eliminating them, a Japanese Mobile Shock Force of Ha-Go and Chi-Nu tanks will arrive and begin to counterattack. The player will be required to take a Type 4 AT rocket (or a Bazooka if one of the AI-controlled gunners is killed) and repel the counterattack supported by friendly Bazooka soldiers and Sherman tanks. Once all the first wave of tanks is eliminated, an OI heavy tank will push through the row of trees a few hundred meters from the player's position, which the player must destroy. The level ends after knocking out the OI tank.
Arsenal of the Empire
- Location: Yokosuka Arsenal, Japan, March, 1946
- Starting Weapons: Model 45A, Smith and Wesson Model 29, Mark II Frag Grenades, M9 Bazooka, machete
- Enemy Weapons: Nambu Pistol, Arisaka Type 38, Arisaka Sniper, Type 4 Rifle, Type 100 SMG, Experimental Model 2 SMG, Type 99 LMG, Type 4 AT Rocket Launcher, AT guns, 8cm/40 AA gun, triple 25mm AA gun, bayonet, Shin-Gunto, lunge mine, Type 99 Grenade, Type 92 HMG
- Other Weapons: M1911, M1 Garand, M1C Garand Sniper, M2 Carbine, Thompson, M3 Grease Gun, BAR, Springfield 1903 Sniper, Winchester M1897, Browning Auto-5, M1919 LMG
- Staring Vehicle: LVT 75mm Howitzer
- Friendly Vehicles: M5 Stuart, M4 Sherman, M4 Sherman "Easy Eight", M3A1 Half Track, SB2C Helldiver
- Enemy Vehicles: Chi-Ha tank, Chi-Nu tank, Te-Ke Tankette, 120mm self-propelled gun, Akizuki-class Destroyer (wreck or immobile), Battleship Nagato (immobile), Battleship Mikasa (Immobile)
- Objectives:
- Capture the Ridgetop
- Destroy the anti-tank guns
- Clear the Yokosuka Docks
- Destroy the O-I tank
- Clear the Mikasa
- Clear the Base Headquarters
- Enter the Tunnels
The level begins with a cutscene describing the American advance on the city of Yokosuka, the main base of the Imperial Japanese Navy. The player takes control of Campo after he exits a half track and joins other US infantry in an assault on a ridge covered by a residential area, supported by Shermans and a Stuart tank. The player can must advance up the street with the rest of the US troops, occasionally being instructed to knock anti-tank guns to allow the tanks to move up, as well as defend them from infantry charging in with lunge mines (suicide weapons consisting of an anti-tank mine on a bamboo pole). The Bazooka the player is equipped with at the start of the level will come both for knocking out Japanese tanks and positions in the many houses. The player can also spot targets for the tanks if they spot a target while standing near a friendly tank. Upon reaching the crest of the ridgetop, the player will be able to see the docks of Yokosuka, filled mostly ships destroyed or crippled by Allied bombing. One intact Akizuki destroyer will fire a salvo of shells at the player's unit. Immediately after that, three SB2C Helldiver dive bombers will bomb and sink the destroyer, allowing the player to continue their advance. The player must advance through the city streets down to the docks through more Japanese tanks and infantry, occasionally being tasked with knocking out an anti-tank gun to allow the armor to move up. Upon reaching the Yokosuka docks, the player will be required to clear the area of various threats, including Japanese Naval Infantry, sniper in the dockyard cranes, and AA guns on the damaged ships (which can be destroyed using a Bazooka or Type 4 rocket or the tanks). After clearing the dockyards, a 120mm self-propelled naval gun will arrive arrive and destroy one of the Shermans in a scripted event. The player must destroy this threat with the help of the tanks using either an AT rocket (there is a Type 4 in an arms cache in a nearby warehouse as the player's Bazooka will likely be out of ammo) or an 80 cm anti-aircraft gun (an intact gun is located on the wreck of the battleship Nagato). After knocking out the heavy self-propelled gun, the player and the surviving US troops will advance to the south to memorial ship Mikasa, a Russo-Japanese war-era pre-dreadnought battleship placed near the base as a museum ship. The player must eliminate the Japanese forces using the museum ship as a bunker for their last stand. The guns are not functional, but they have placed two machine guns and an AA gun on the deck, as well multiple snipers and dozens of infantry. After clearing the Mikasa, the player will be required to clear the headquarters building. An arms cache with a Browning Auto-5 will be available to the player shortly before entry, which will come in useful in the close-range fighting in the building. After clearing the building, a cutscene will play where the player and the rest of his squad discover the entrance to the bunkers and tunnels underneath Yokosuka.
Into the Depths
- Location: Tunnels under Yokosuka, Japan, March, 1946
- Starting Weapons: Thompson SMG, Winchester M12, Mark II Frag Grenades, machete
- Enemy Weapons: Nambu Pistol, Nambu Sword-Pistol, Arisaka Type 38, Type 4 Rifle, Type 100 SMG, Experimental Model 2 SMG, Type 99 LMG, bayonet, Shin-Gunto, Type 99 Grenade, Type 92 HMG (mounted), Type-2 aircraft machine gun (mounted)
- Other Weapons: M1 Garand, M2 Carbine, M3 Grease Gun, BAR, Sieg M1946, Winchester M1897, Browning Auto-5, M2 Flamethrower, M1919 LMG, Satchel Charge,
- Staring Vehicle: N/A
- Friendly Vehicles:N/A
- Enemy Vehicles: J7W Shinden (partially assembled in factory), Coastal Gun (unusable, in gun battery)
- Objectives:
- Capture the Mess Hall
- Capture the R&D Facility
- Capture the Weapons Factory
- Capture the Aircraft Factory
- Capture the Barracks
- Capture the Gun Battery
After a short cutscene in which Campo and the Marines enter the tunnels beneath Yokosuka. The player must first navigate a series of corridors, fighting their way through Japanese defenders, before coming to the R&D facility, a series of rooms with various partially complete weapons on the tables and blueprints on the walls. There is also an armory with several captured Allied weapons that the player can use if they desire to. After clearing the R&D facility, the player must clear the aircraft and weapons factories, which consist of wide underground rooms where they will face heavy resistance, including mounted machine guns. After clearing the factories, the player ascended to a higher level, clearing out a barracks with several individual living quarters and an armory, before finally reaching a coastal gun battery in a cave on a hill overlook Yokosuka. After clearing the battery, the mission is complete.
Road to Tokyo
- Location: Kanagawa, Japan, April, 1946
- Starting Weapons: Thompson, M1 Garand, Mark II Frag Grenades, machete, M9 Bazooka
- Enemy Weapons: Nambu Pistol, Arisaka Type 38, Type 4 Rifle, Type 100 SMG, Experimental Model 2 SMG, Type 99 LMG, bayonet, Shin-Gunto, Type 99 Grenade, Type 92 HMG (mounted), Type 4 AT Rocket Launcher, AT Gun,
- Other Weapons: M2 Carbine, M3 Grease Gun, BAR, Model 45A, Winchester M12, Browning Auto-5,M2 Flamethrower, M1919 LMG, Satchel Charge,
- Staring Vehicle: N/A
- Friendly Vehicles:N/A
- Enemy Vehicles:
Heart of the Empire
- Location: Chiyoda, Tokyo, Japan, May, 1946
- Starting Weapons: Sieg M1946, M1C Garand Sniper, Mark II Frag Grenades, machete, M9 Bazooka
- Enemy Weapons: Nambu Pistol, Arisaka Type 38 (Infantry, Sniper), Type 4 Rifle, Type 100 SMG, Experimental Model 2 SMG, Type 99 LMG, bayonet, Shin-Gunto, Type 99 Grenade, Type 92 HMG (mounted), Type 4 AT Rocket Launcher, AT Gun, Lunge Mine
- Other Weapons: M1911, M2 Carbine, M1 Garand Infantry, M3 Grease Gun, BAR, Model 45A, Springfield M1903, Winchester M12, Browning Auto-5, M2 Flamethrower, M1919 LMG, Satchel Charge
- Staring Vehicle: N/A
- Friendly Vehicles: M4 Sherman Tank, M26 Pershing Heavy Tank
- Enemy Vehicles: Ha-Go tank, Chi-Nu tank, O-I tank
- Objectives:
- Capture the Japanese Imperial Diet Building
- Capture Hibiya Park
- Destroy the counterattacking tanks
- Secure and Enter the Sakurada-mon Gate
- Survive the Banzai Charge
- Secure and Enter the Niju-Bashi Gate
- Clear the Imperial Palace
- Cross the inner moat
- Capture Edo Castle
- Bonus Objectives:
- Destroy the AT guns at the Diet before they can destroy a friendly tank (Codex: The Japanese Diet)
- Destroy the AT guns at the Sakurada-mon Gate before they can destroy a friendly tanks (The Emperor during World War II)
A cutscene described the US force's attack on Tokyo itself, weeks of bloody street-to-street fighting the ruins of the city. Finally, on the anniversary of the fall of Berlin, the US troops stand poised to take what remains of the Imperial Diet and Palace. While the Emperor and the top brass of the military had by this point fled to the north, the fall of the Palace would be a severe blow to Japanese Morale. Standing in their way are fanatically loyal defenders with orders to defend to the last man, and the will to carry out those orders to their last breath. The player starts out in the streets near the rear entrance of the Diet building, where they will advance under the support of Sherman and Pershing tanks, opposed by Japanese infantry, emplaced guns, and a couple Chi-Nu tanks. After clearing the defenses of the exterior of the diet, the player will be directed to enter the building, where they will have to fight through a series of interior rooms on three floors in heavy close-quarters combat. After clearing the Diet building, the player will continue, supported by armor and friendly infantry to attack the Japanese defenses at Hibiya park. After clearing the defense, a Japanese force of infantry and armor will counterattack, led by an O-I heavy tanks, which will make its presence known when it destroys the lead Pershing of the column with its gun. The player must hold off this force, attacking the tanks with their Bazooka or one of the many anti-tank guns and Type-4 rocket launchers in the park. After holding off the counterattack, the player and Allied troops advance on the Sakurada gate of the Imperial Palace, where the player must eliminate AT gun crews, machine gunners, and snipers on top of the gate, before crossing the bridge into the outer gardens of the Imperial Palace. Once they enter the outer gardens, a force of Japanese troops will launch a Banzai charge across the Nijubashi bridge supported by AT guns and machine guns on the inner gate, as well as a tank. The player must hold off the charging IJA infantry, who include suicide bombers with pole mines, while also contending with the supporting guns on top of the Gate. After clearing the second gate and crossing the Niju-bashi bridge, the player will be met with a second close-quarters combat section in the interior of the Imperial Palace buildings. After clearing the palace, the player will be met with a third moat and defended gate and bridge, leading to the east gardens and the ruins of Edo Castle. At Edo Castle, the player will be faced with clearing a series of gardens and buildings, before reaching the remains of the castle itself, defended by machine gun nests and snipers. Upon reaching the top of the ruins and eliminating all defenders, a cutscene will play and the level end.
The Bitter End
- Location: Near Mount Nikko-Shirane, May, 1947
- Starting Weapons: Model 45A, Thompson, Mark II Frag Grenades, machete, rifle grenade
- Enemy Weapons: Nambu Pistol, Arisaka Type 38 (Infantry, Sniper), Type 4 Rifle, Type 100 SMG, Experimental Model 2 SMG, Type 99 LMG, captured US weapons, bayonet, Shin-Gunto, Type 99 Grenade, Type 92 HMG (mounted), Type 4 AT Rocket Launcher, AT Gun, Lunge Mine, AT Mine
- Other Weapons: M1911, M2 Carbine, M1 Garand, Springfield M1903 (Sniper), M3 Grease Gun, BAR, Sieg M1946, Winchester M12, Browning Auto-5, M9 Bazooka, M2 Flamethrower, M1919 LMG, Satchel Charge
- Staring Vehicle: N/A
- Friendly Vehicles: Jeep, 2.5 ton truck, M3 Half-Track, M8 Greyhound, M4 Sherman Tank, P-51 Mustang
- Enemy Vehicles:
From the North
- Player Character: Ivan Mayakovsky
- Location: Hokkaido, Japan, November, 1945
- Timeline: Invasion of Japan (takes place in same alternate timeline as the two Operation Downfall war stories).
Shibetsu Landing
- Location: Shibetsu, Japan, November, 1945
- Starting Weapons: Mosin-Nagant, Tokarev TT-33, RGD-33 grenades, Soviet entrenching tool
- Enemy Weapons: Nambu Pistol, Arisaka Type 38, Type 4 Rifle, Type 100 SMG, Experimental Model 2 SMG, Type 99 LMG, bayonet, Shin-Gunto, Type 99 Grenade, lunge mine, Type 4 rocket launcher, Type 89 grenade discharger, Type 92 HMG (mounted), Type-2 aircraft machine gun (mounted)
- Other Weapons: Mosin-Nagant Sniper, PPSH-41, SVT-40, AVS-36, DP-28, PTRS-41, M9 Bazooka
- Staring Vehicle: N/A
- Friendly Vehicles: BT-7, T-34, ISU-152, Yak-4, Il-2 Sturmovik, Pe-4, Landing craft, Landing Ship Tank, Gnevny-class Destroyer
- Enemy Vehicles: Ha-Go, Chi-Nu, anti-tank gun, coastal artillery, A6M Zero, J7W Shinden, D4Y Judy
- Objectives:
- Knock out the beach defenses
- Clear out trench line
- Attack the town of Shibetsu
- Eliminate the rocket crews
- Defend the tanks
- Repel the Japanese Counterattack
Silence the Guns
Nakashibetsu
Conquer the Heights
Blood Red Snow
Finishing Blow
Re-armed (Unthinkable DLC)
- Player Character: Lt. Karl Hassler, former tank Commander, Grossdeutschland Panzer Division (re-armed for Operation Unthinkable)
- Timeline: Operation Unthinkable,
- Period: 1945-1947
The Cursed Soldier (Unthinkable DLC)
Jet vs Jet (Unthinkable DLC)
Multiplayer Maps
The maps of The War That Never Was can be divided into historical proposed operations they were based on.
Operation Sea Lion
Dover
- UK Vehicles: 3x tanks (Mark IV cruiser, Valentine, Churchill), 2x Armadillo, 2x Universal Carrier, 1x Humber Armored Car, 3x aircraft (Spitfire, Swordfish, Halifax), 3x Motor Torpedo Boat, 2x Tribal-class destroyer, 1x King George V-class Battleship, coastal guns
- German Vehicles: 3x tanks (Panzer II, Panzer IV, or StuG III), 1x Schwerer Panzerspahwagen, 2x Hanomag half track, 2x Universal Carrier (captured), 3x Aircraft (Me-109, Stuka, Ju-88), 3x E-boat, 2x Type 1936 destroyer, 1x Bismarck-class Battleship, landing barges
Map based on the area around Dover, England, including the famous White Cliffs, as well as the Port of Dover and Dover Castle. In terms of the alternate history, this map represents the initial German invasion. The map is intended for a large number of players, with numerous vehicles and stationary gun positions.
Westminster
- UK Vehicles: 1x tanks (Mark IV cruiser, Valentine, Churchill), 1x Armadillo, 2x Universal Carrier, 1x Motor Torpedo Boats, barges
- German Vehicles: 1x tanks (Panzer II, Panzer IV, or StuG III), 2x Universal Carrier (captured), 1x Hanomag half track, 1x E-boats, barges
Based on the area around the Houses of Parliament in London, in an alternate history in which the German landings made it into the city itself, with heavy British resistance. Buildings on the map including the Houses of Parliament, Westminster Abbey, the Westminster Bridge, the Royal Treasury, and British Supreme Court. The map is primarily infantry and armored combat in the streets, but also includes boat combat in the River Thames.
Scapa Flow
- UK Vehicles: 4x aircraft (Spitfire, Swordfish, Halifax), 4x Motor Torpedo Boat, 3x Tribal-class destroyer, 1x King George V-class Battleship, coastal guns
- German Vehicles: 4x Aircraft (Me-109, Stuka, Ju-88), 4x E-boat, 3x Type 1936 destroyer, 1x Bismarck-class Battleship, landing barges
A primarily air and naval map based on Scapa Flow in northern Scotland, the base of the British Fleet in the Second World War. In terms of the alternate history, the map will be based on a German naval and air attack on the fleet, with the British defending. The map includes multiple islands and harbor facilities, with the dock aircraft carrier Ark Royal acting as the British spawnpoint.
Welsh Valleys
- UK Vehicles: 3x tanks (Mark IV cruiser, Valentine, Churchill), 2x Armadillo, 2x Universal Carrier, 3x aircraft (Spitfire, Swordfish, Halifax)
- German Vehicles: 3x tanks (Panzer II, Panzer IV, or StuG III), 2x Universal Carrier (captured), 2x Hanomag half track, 3x Aircraft (Me-109, Stuka, Ju-88)
Based on the mountainous coal-producing region of South Wales, the map includes multiple high mountain ridges traversed by a few roads, with a coal mine in the mountains and a town in the valley floor.
Edinburgh
- UK Vehicles: 2x tanks (Mark IV cruiser, Valentine, Churchill), 2x Armadillo, 2x Universal Carrier
- German Vehicles: 2x tanks (Panzer II, Panzer IV, or StuG III), 2x Schwerer Panzerspahwagen, 2x Hanomag half track
Urban combat map featuring armor and infantry, based on the city of Edinburgh in Scotland, featuring a the downtown area including Edinburgh Castle, Edinburgh University, Holyrood Palace, St. Giles Cathedral, and hilltop of Arthur's Seat, as well as numerous narrow streets and alleyways divided by various buildings. This map is intended to take place in a timeline where the Germans managed to not only invade Britain, but push the British back to Scotland (however unlikely that might have been).
Operation Tannenbaum
Basel
- Faction 1: Swiss Army
- Faction 2: Wehrmacht
- Swiss Vehicles: 2x Panzer 38t, 2x Universal Carrier, 2x Type 41 Patrol Boat, Barges
- German Vehicles: 2x Panzer 38t, 2x Universal Carrier (captured), 1x E-boat, Barges
Based on the city of Basel, on the River Rhine near the Swiss border with both France and Germany. Had Operation Tanenbaum occurred, this would have been one of the first cities to be attacked. In-game, the map is divided by the River Rhine, with one side consisting of an industrial and port area, while the other side is modeled after the real world Old Town of Basel, including the Elisabethenkirche church and the Basel Minster. The map can be played in both Conquest and Conquest Assault, focusing on infantry combat with both sides supported by Panzer 38t light tanks (used by both the Swiss and Germans), as well as riverine combat on the Rhine.
Geneva
Bern
Martigny
St. Gotthard Pass
- Faction 1: Swiss Army
- Faction 2: Wehrmacht
- Swiss Vehicles: 2x tanks (Panzer 38t, Renault R35, Nahkampfkanone), 2x Universal Carrier, 3x artillery emplacements, 2x AA emplacements, 2x aircraft (D-3800, Potez 630)
- German Vehicles: 4x tanks (Panzer 38t, Panzer IV, STuG III), 2x Universal Carrier (captured), 1x Hanomag half track, 3x aircraft (Me-109, Stuka, Ju-88)
Based on the highly fortified St. Gotthard Pass high in the Swiss Alps, this map is designed to be played on Conquest Assault, with the Germans attacking and Swiss defending the high ground. The German's larger number of tanks and aircraft is countered by the Swiss' superior positions and multiple fortified gun emplacements. The map itself includes a winding road up the pass with multiple bridges and tunnels, including the famous Devil's Bridge. At the top of the pass, the main St. Gotthard Fortress, as well as the mountain peaks on either side of the fortress dominant the landscape. Multiple smaller bunkers are also located along the road up to the fortress.
Operation: Downfall
Tanegashima
- Faction 1: United States of America
- Faction 2: Japanese Empire
- US Vehicles: 4x Tanks (M5 Stuart, M4 Sherman, M26 Pershing), 1x T28 Super-heavy Tank, 2x LVT howitzer, 2x aircraft (F8F Bearcat, SB2C Helldiver, B-29 Superfortress), 1x P-80 Shooting Star, Landing Craft, 1x Fletcher-class Destroyer, 1x Iowa-class battleship (non-respawning)
- Japanese Vehicles: 2x Tanks (Chi-Ha, Chi-Nu, O-I), 2x Te-Ke Tankettes, 1x 120mm SP Naval Gun, 3x Heavy coastal guns, 4x light Artillery, 2x AA guns, 2x aircraft (J7W Shinden, D4Y "Judy", G4M "Betty"), 1x Nakajima Kikka, 2x Akizuki-class Destroyer, 3x Torpedo Boat
Based on the southern end of the island of Tanegashima, located south of Kyushu, and one of the islands that was among the first targets for the US Invasion during Operation Downfall, should it have been carried out. The terrain consists a coast which is a mix of sandy beaches and cliffs, with flat farmland separated by rows of trees further inland. Moving further inland, the terrain gets hillier surrounding a town which forms one of the conquest capture points, along with various points, both along the coast and inland. The map is designed to be played on Conquest Assault with large numbers of players, with the US attacking and Japanese defending. As such, the US gets more tanks and a non-respawning Iowa-class battleship, but the Japanese start with control over multiple gun batteries and bunkers located both on the coast and further inland, as well as an extra destroyer and three torpedo boats. Both sides also have two light vehicles (LVT for US and Te-Ke tankette for the Japanese), as well as two piston-engined aircraft and a jet fighter.
Satsuma
- Faction 1: United States of America
- Faction 2: Japanese Empire
- US Vehicles: 4x Tanks (M5 Stuart, M4 Sherman, M26 Pershing), 1x T28 Super-heavy Tank, 3x LVT howitzer, 2x aircraft (F8F Bearcat, SB2C Helldiver, B-29 Superfortress), 1x P-80 Shooting Star, Landing Craft, 1x Fletcher-class Destroyer, 1x Iowa-class battleship (non-respawning)
- Japanese Vehicles:*Japanese Vehicles: 2x Tanks (Chi-Ha, Chi-Nu, O-I), 2x Te-Ke Tankettes, 1x 120mm SP Naval Gun, 3x Heavy coastal guns, 4x light Artillery, 2x AA guns, 2x aircraft (J7W Shinden, D4Y "Judy", G4M "Betty"), 1x Nakajima Kikka, 2x Akizuki-class Destroyer, 3x Torpedo Boat
A large map based on one possible Allied landing site in Kyushu, on the western side of the Satsuma Peninsula. The map features the area around the Manose River and Bay, with sandy beaches to the north and south of the bay, guarded by bunkers and trenches. Beyond the beaches are mostly flat farmlands, leading up to an area of low forested hills, beyond which stands the city of Minamisatsuma. The map is designed for Conquest Assault with large numbers of players, with the US attacking and Japanese defending. The US gets a non-respawning Iowa-class battleship to help cover their assault. Both sides get two piston-engine aircraft, and one jet.
Shibushi Bay
Kagoshima
- Faction 1: United States of America
- Faction 2: Japanese Empire
- US Vehicles: 2x tanks (M5 Stuart, M4 Sherman, M26 Pershing), 2x Jeep
- Japanese Vehicles: 2 tanks (Ha-Go, Chi-Nu, O-I), 2x Kurogane Scout Car
Based on the city of Kagoshima in Kyushu, the target of Operation Coronet, the first invasion of Operation Downfall, as it was during the Second World War. The city will include a residential area consisting of traditional Japanese houses, as well as a downtown with more modern-looking buildings, as well as port area. Many of the buildings will be damaged by US bombing.
Sakurajima
- Faction 1: United States of America
- Faction 2: Japanese Empire
- US Vehicles: 1x M5 Stuart light tank, 2x M8 Greyhound Armored Car, 2x Jeep, 2x aircraft (F8F Bearcat, SB2C Helldiver)
- Japanese Vehicles: 1x Ha-Go light tank, 2x Te-Ke Tankettes, 2x Kurogane Scout Car, 2x aircraft (J7W Shinden, D4Y Judy)
Based on the volcanic former-island (was an island until a lava flow connected into the mainland in 1914 of Sakurajima in Kagoshima Bay. The terrain around the lower slopes of the volcano is mostly forested, with two towns located on the northwest and southwest corners of the island. The forests are traversed by a main road circling the coast, along with a smaller dirt roads to provide flanking routes for tanks. The upper slopes and crater the volcano, as well as the forests are all accessible to infantry, allowing for excellent flanking routes. Both sides are supported by one light tank, a few light ground vehicles, and two fighters or attack aircraft. The map is intended for play on Conquest, with the US attacking from the land bridge to the mainland on the east side of the island, and the Japanese starting on the west side.
Hiratsuka
Yokosuka Tunnels
- Faction 1: United States of America
- Faction 2: Japanese Empire
- Vehicles: Infantry only
Based on the vast network of at least 27 kilometers of underground tunnels, including barracks, weapons emplacements, munitions factories, hospitals, power stations, and other facilities that the Japanese constructed under the Yokosuka Arsenal and the surrounding area during World War II. The map consists of the interior of these tunnels, and is a close-combat map similar to Fort de Vaux and Operation Metro from previous Battlefield titles. Rooms on the map include a munitions factory, a barracks, a power station, and gun battery, with the Yokosuka Arsenal map visible from the gunports.
Yokosuka Port
Chiyoda
Soviet Invasion of Hokkaido
Karafuto Fortress
- Side 1: USSR
- Side 2: Japanese Empire
- USSR Vehicles: 1x ISU-152, 2x Tanks (BT-7, T-34, IS-2), 3x BA-10
- Japanese Vehicles: 1x tank (Chi-Ha, Chi-Nu, O-I) 3x Fortress Gun, 2x Te-Ke tankette
Based on the taking of the Japanese Karafuto line in South Sakhalin Island, a real event in the Japanese bogged down Soviet advance until August 15th, 1945. The map is designed for the Conquest Assault game mode, with the Soviets attacking and the Japanese defending. The Soviets get more armored vehicles to counter the Japanese holding all three heavy fortress gun batteries at the start of the match.
Shibetsu Landing
Mt Yotei
Sapporo
Hakodate Channel
Operation Unthinkable (DLC)
Note: In battles maps with the faction "Allies", the spawned soldier will randomly be US, UK, Canadian, French, or a re-armed Wehrmacht soldier.
Dresden
- Side 1: Allies
- Side 2: USSR
Second Battle of Berlin
- Side 1: Allies
- Side 2: USSR
Julian March
- Side 1: UK
- Side 2: Yugoslavia
Prague
- Side 1: Allies
- Side 2: USSR
Second Warsaw Uprising
- Side 1: Armia Krajowa, Allied air support
- Side 2: USSR
Linz
Armageddon
- Side 1: Allies
- Side 2: USSR
The map consists of the ruins of an unspecified eastern European city hit by an atomic bomb attack, including numerous burning structures, piles of rubble, the remains of concrete and brick buildings, burnt-out vehicles, and shadows of victims of the blast visible burned onto concrete.
Wunderwaffe DLC
V3 Cannon
- Side 1: Canadian Army
- Side 2: Wehrmacht
- Vehicles: Infantry Only
Based on the base of the V3 "London Cannon" at Mimoyecques in France, which in real life fell to the Canadians without resistance. The map consists of a series of underground bunkers, including munitions bunkers, gun shafts, and other underground chambers and corridors for a close combat map.
Le Coupole
- Side 1: Canadian Army
- Side 2: Wehrmacht
- Vehicles: Infantry Only
Based on Le Coupole, a dome-shaped underground bunker and missile silo for V2 missiles in the Pas-de-Calais in France. The map includes multiple railroad tunnels, some large enough to hold a V2 missile upright on the way to the launch bay (one such missile is present on a train car in one of the tunnels). The central launch bay consists of a large dome-shaped room with multiple catwalks and side corridors entering on multiple levels.
Luftwaffe '46
- Side 1: US Army
- Side 2: Wehrmacht
- US Vehicles: Jeep x2, M3 Halftrack x2, Tanks (M5 Stuart, M4 Sherman, M26 Pershing) x2, T28 Heavy Tank x1, Aircraft (P-80 Shooting Star, P-59 Aircomet, B-29 Superfortress) x3
- German Vehicles: Kubelwagen x2, Hanomag x2, Tanks (Panzer 38t, Panzer IV, Tiger) x2, Maus Heavy Tank x1, Aircraft (Ta-183, Hs-129, Junkers Ju-88) x3
The map consists of a fictional German airbase partially hidden in bunkers drilled into the Bavarian Alps. The aircraft featured on the map are based on the line of aircraft sometimes described as "Luftwaffe '46- experimental fighter aircraft that would have entered service had the war continued into 1946. While air combat is the primary focus, the map also offers ground combat in the airfield featuring infantry, light vehicles, and tanks.
Fallen Giant
- Side 1: Red Army
- Side 2: Wehrmacht
- Soviet Vehicles: 2x BA-10 (4 in Ratte Assault), 2x Tanks (5 in Ratte Assault), 1x ISU-152 (Ratte Assault only), 2x (3 in Ratte Assault) Aircraft (Yak-9, Il-2 Sturmovik, Pe-4)
- German Vehicles: 2x Schwehrer Panzerspahwagen, 2x (Panzer 38t, Panzer IV, Tiger) tanks (1 in Ratte Assault), 2x Aircraft (Me-109, Ju-87 Stuka, Junkers Ju-88) P-1000 Ratte x1 (Ratte Assault only)
A map consisting of open terrain with some forests and a village in the center, typical of Eastern Europe (similar to the Galicia map in BF1). In the center of the map is destroyed Landkreuzer P-1000 Ratte super-heavy tank. In the Ratte Assault game mode, the Germans are given the an intact Ratte, but only one tank and control of none of the objectives, while the Soviets have control of all of the objectives and numerous armored vehicles.
Kummersdorf
- Side 1: Red Army
- Side 2: Wehrmacht
- Soviet Vehicles: 2x BA-10, 3x Tanks (BT-7, T-34, IS-2), 1x ISU-152
- German Vehicles: 2x Schwehrer Panzerspahwagen, 3x tanks (Panzer 38t, Panzer IV, Tiger), 1x Maus
Weapons
In addition to weapon model assets reused from other games, such as Battlefield 1 and Battlefield II, Battlefield: The War That Never Was featuring multiple new weapons.
Wehrmacht
Reused Assets
- SS Dagger
- Nahkampfmesser 42
- Luger P08
- Walther P38
- Mauser C96
- Kar98K
- Mannlicher 95
- MP-40
- Gewehr 41
- STG-44
- FG-42
- MG-34
- MG-42
- Panzerschreck
- M30 Luftwaffe Drilling
- Flammenwerfer 40
- Walther Toggle Action
- Stielhandgranate
Fliegerfaust
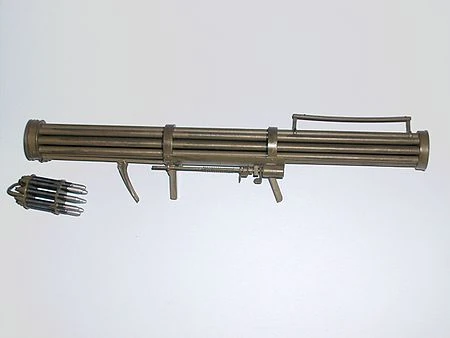
- Type: AA Rocket Launcher
- Caliber: 20mm airburst
- Class: Assault
- Magazine: 9 (fired simultaneously)
The Fliegerfaust was a German-designed nine-shot 20mm rocket launcher designed for use against low-flying aircraft at ranges of less than 500 meters. The weapon saw limited combat deployment at Saarbrucken, as well as during the Battle of Berlin. In-game, the weapon can disable or even shoot down an incoming aircraft if at least seven of the rockets hit (only likely at very close range, i.e. against a strafing fighter or dive bomber), and is capable of destroying light ground vehicles and structures, but is not effective against tanks, and only a maximum of three 9-round loaders are available at a given time.
Krummlauf Bent Barrel (Wunderwaffe DLC)
- Type: Attachment/Gadget
- Class: Medic
The Krummlauf, or bent barrel was an an attachment to the end of the barrel of the STG-44 rifle which consisted of a bent barrel extension curved at either a 45 or 90 degree angle for firing around corners or out of armored vehicles. The weapon was equipped with a periscope to allow for firing around corners. The device had a short lifespan of between 150 and 300 rounds before breaking due to the pressure of firing, and would often fragment rounds, creating a shotgun-like effect. In-game, the Krummlauf is a gadget that can be equipped by the Medic class and attached to any medic weapon (auto/semi-automatic rifle). In-game, the weapon has a lower muzzle velocity than a standard rifle shot and the device will only last for 30 rounds, both the balance it and reflect the unreliability of the real-world device.
Swiss Army
Reused Assets
- Luger P08
Schmidt M1882
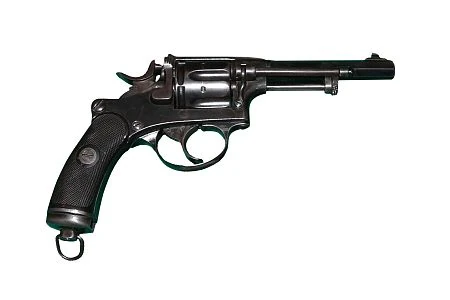
- Type: Revolver
- Class: All
- Magazine: 6
The Schmidt 1882 was a Swiss-designed revolver using a 7.5mm black powder cartridge fired from a six-round cylinder loaded using rear loading gate. The weapon was designed in 1882 by Rudolf Schmidt and first adopted by the Swiss Army in 1882. While it was partially replaced by the Luger P08 semi-automatic pistol starting in 1900, the modernized M1882-29 variant was officially in service until 1949 and some saw use until the 1970s. In game, it behaves similarly to most revolvers, doing a higher damage, but having a lower rate of fire.
K-31 Rifle
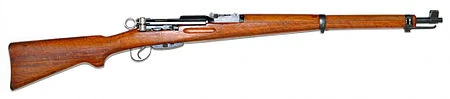
- Type: Rifle
- Class: Scout
- Variants: Infantry, Marksman, Sniper
- Magazine: 6
The K-31 was the Swiss Army standard issue rifle starting in 1933 until 1958, with some examples seeing use until the 1970s, and many still in use today as civilian target shooting and hunting rifles. The weapon was a straight-pull bolt-action rifle based on the earlier Schmidt-Rubin, giving it a faster rate of fire than contemporary turn-bolt rifles, including the Mauser K98. The rifle fired a high-velocity round known for its accuracy over long-ranges. In-game, the weapon is optimized for use as a long-range sniper weapon, with two different scopes available.
SIG MKMO
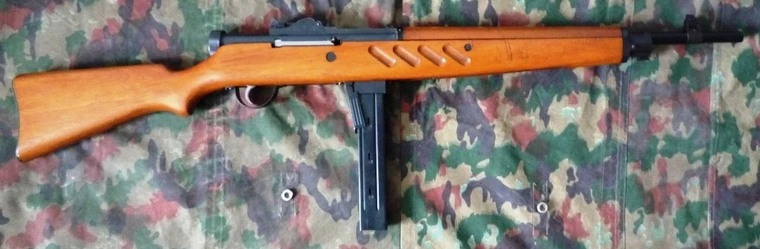

- Type: SMG
- Class: Assault
- Variants:
- Magazine: 40
The SIG MKMO was a submachine gun developed in the 1930s in Switzerland with a larger magazine and longer barrel than most SMGs. The weapon was unique in that it was the first such weapon to have a folding magazine well for transport and a dust cover for the magazine well. The MKMO saw service with the Swiss Army, police, and the Vatican Swiss Guard, as well as in Finland, where it saw combat in the Continuation War.
Lmg-25


- Type: LMG
- Class: Support
- Rate of Fire: 500 RPM
- Variants: Low Weight, Storm, Telescopic
- Magazine: 30
The Lmg-25 was a Swiss light machine gun designed in the 1920s by Colonel Adolf Furrer, and first seeing use in 1925. The weapon fired the same 7.5mm cartridge as the K-31 from a 30-round magazine at a rate of fire of up to 500 RPM. The weapon never saw combat, however, had the Operation Tannenbaum actually occurred, the Lmg-25 would have been one of the weapons used against the German invaders.
Solothurn S-18/1000
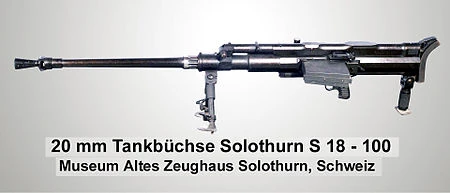

- Type: Anti-tank rifle
- Class: Tank Hunter
- Magazine: 10
The Solothurn S-18/1000 was an anti-tank rifle made by the Swiss Solothurn company with secret involvement of the German Rheinmetall corporation, who were forbidden from manufacturing such weapons under the Treaty of Versailles. The weapon fired a 20mm round from a ten-round magazine, but was so heavy that it was impossible for a single man to carry it (though in-game, it will be possible to do so- similarly to how the M1917 is portrayed in BF1). The weapon saw combat with the German and Italian armies in World War II, but was phased out as tank armor became so thick that the 20mm round was unable to penetrate it.
Swiss Dagger


- Speed/Damage Model: Fast/Low
- Type: Knife
The Swiss Dagger is a type of dagger that first appeared in 15th century Switzerland, with two inward facing metal bars at either end of the hilt, the top one acting as a guard and the lower one resembling the pommel of a sword. The weapon was part of the Swiss Army officer's dress uniform from 1943 until 1995, and the Germans modeled many of the ceremonial military daggers after the weapon, including the SS dagger.
Swiss Degen


- Speed/Damage Model: Medium/Medium
- Type: Short Sword
The Swiss Degen was short sword originating in Switzerland in the 15th century with a "double-crescent" guard shape similar to the smaller Swiss Dagger. The weapon's blade ranged anywhere from 40-70 centimeters. It was often used as a sidearm for Swiss mercenary pikemen during the late medieval and early Renaissance period.
Ice Axe
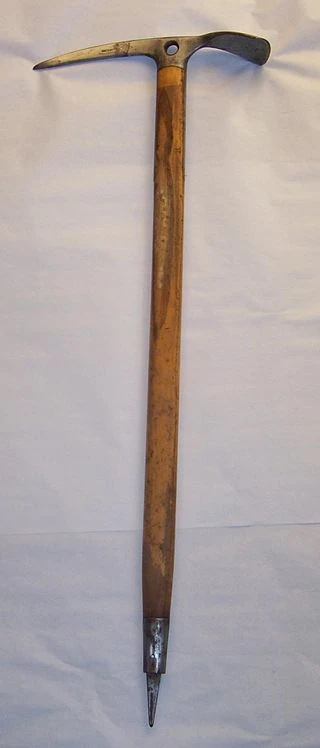

- Speed/Damage Model: Slow/High
- Type: Ice axe
An ice axe is a tool used for mountaineering and ice climbing with a pick on one end of the head and a combination adze and a hammer head on the other. The tool is used for arresting falls, climbing walls of ice, carving footholds into ice, or, in the case of longer ice axes, as a walking stick. While not designed as a weapon, the ice axe can be used as such, with a sharp point capable of punching through flesh and bone. One famous case of an ice axe used as a weapon was the assassination of Leon Trotsky in Mexico in 1940.
Imperial Japanese Army
Reused Assets
- Nambu Pistol
- Type 26 Revolver
- FN Browning 1903
- Type 38 Rifle
- Type 100 SMG
- Type 99 LMG
- Type 92 HMG
- Shin Gunto/"Katana"
Model 2 Submachine Gun
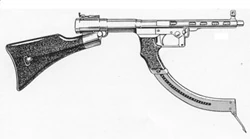

- Type: SMG
- Caliber: 8mm Nambu
- Rate of Fire: 800 RPM
- Class: Assault
- Magazine: 50 rounds
The Model 2 was an experimental Japanese submachine gun designed in the 1930s, which saw limited production starting in 1944, but never was produced in significant numbers. The weapon fired from a magazine mounted in the grip, similar to the later Uzi or MAC-10, the first weapon to utilize such as design.
Type 4 Rocket Launcher


- Type: AT Rocket Launcher
- Caliber: 70mm HEAT
- Class: Assault
- Magazine: 1
The Type-4 was a 70mm anti-tank rocket launcher based on the American Bazooka designed by the Japanese in 1944 and first seeing service in 1945. The weapon was held back from frontline service to defend against an possible invasion of the Japanese home islands, and thus never saw combat. The weapon was designed to be fired by a soldier lying prone, and was equipped with a bipod for this purpose. In-game, it replaces the Bazooka as the rocket launcher used by the Assault class when playing as the Japanese.
Nambu Pistol-Sword
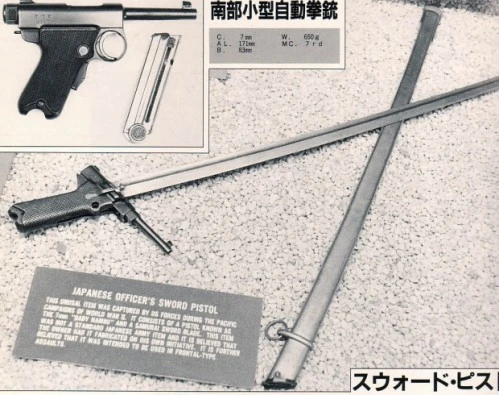

- Type: Combination Sword/Pistol
- Speed/Damage Model (Melee): Medium/Medium
- Caliber: 7mm Nambu
- Class: All
- Magazine: 7 rounds
At least one example of an unusual combination of a Japanese Nambu pistol and Shin Gunto military sword is known to exist. Created at some point late in the war, it was recovered incomplete and missing a trigger. While the weapon looks impressive, it its utility in combat is doubtful, as the pistol grip would provide poor ergonomics from the sword, and the weight of the blade may interfere with aiming. In-game, the weapon has a draw animation similar to the Shin Gunto or saber and a faster melee attack when drawn. If the melee button is held down while the weapon is equipped, it can be charged with similarly to a bayonet.
Tanto
- Speed/Damage Model: Medium/Medium
- Type: Knife
Bamboo Spear
- Speed/Damage Type: Slow/High (Capable of Charging)
- Type: Knife
US Army
Reused Assets
- Colt M1911
- M1917 Revolver
- Springfield M1903
- M1 Garand
- M1A1 Carbine
- Johnson M1941 rifle
- M1A1 Thompson
- M3 "Grease Gun"
- Reising M50
- M1918 BAR
- M1919 LMG
- Browning M2 HMG
- Browning M1917 HMG
- M1897 Trench Gun
- M1912 Trench Gun
- Browning Auto 5
- Mark II Frag Grenade
- M9A1 Bazooka
- KA-BAR
Smith & Wesson Model 27
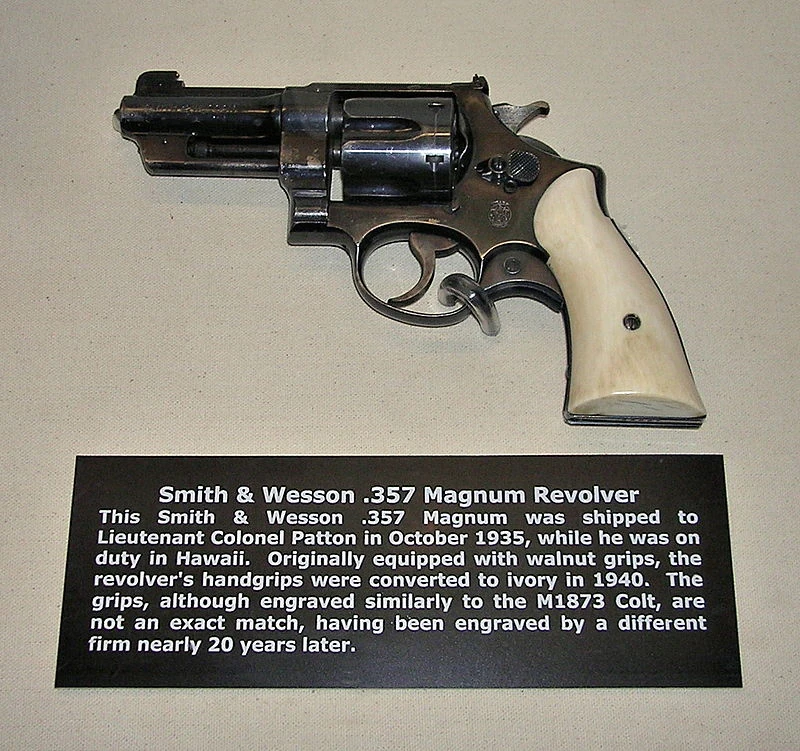

- Type: Revolver
- Caliber: .357 Magnum
- Magazine: 6
- Class: Assault
The Smith and Wesson Model 27 was the first handgun to chamber the .357 magnum round, a more powerful version of the older .38 Special. The weapon was first developed in 1935, when it became popular with police and the FBI for its stopping power even against targets in armored cars, as many gangsters of the period owned. Production was halted for the Second World War, but some did find their way to the war as private-purchased weapons, most notably, General George S. Patton carried a .357 magnum which he referred to as his "killing gun". In-game, the weapon has the highest damage output of any revolver, at 60 damage for a body shot up to 10 meters, or a one-shot kill headshot, but has very high recoil and low capacity.
M2 Carbine
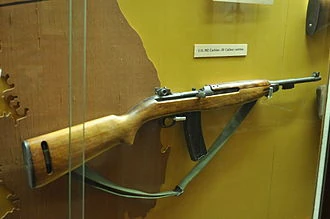

- Type: Automatic Carbine/Assault Rifle
- Caliber: .30 Carbine
- Magazine: 30
- Class: Assault
- Rate of Fire: 750 RPM
The M2 carbine was an M1 Carbine modified for fully automatic fire with a rate of fire of about 750 RPM, first issued starting in 1944, often as a conversion kit for the M1. The weapon could fire from a 15 or 30-round magazine, and had a greater effective range than the Thompson or M3 submachine gun. In spite of its combat effectiveness, the weapon did not see widespread use in WWII, with most example that did see action being used in the closing months of the war against Japan. Had the invasion of Japan commenced, however, the M2 would have been among the weapons carried into battle by US soldiers and Marines.
Model 45A
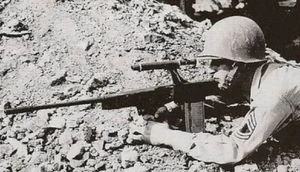

- Type: Battle Rifle/LMG
- Caliber: .30-06
- Magazine: 20
- Class: Support
- Rate of fire: 350 RPM
The Model 45A was battle rifle or light machine gun developed late in the Second World War by US forces in the Philippines. The weapon had a bullpup design with a 20-round magazine from the BAR and a rate of fire of between 350 and 650 RPM. The few photos of the weapon depict it with a telescopic sight. In-game, the weapon had a low-rate of fire, but higher damage is more controllable than other LMGs, making it more effective at long-range, particularly with the telescopic sight.
Sieg M1946 Automatic Rifle
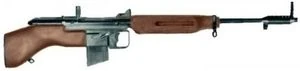

- Type: Battle Rifle
- Caliber: .30-06
- Magazine: 20
- Class: Medic
- Rate of fire: 700 RPM
The Sieg M1946 Automatic Rifle, designed by Gunners Mate James Sieg of the US Coast Guard in 1946 arrived too late to see action in World War II, however, had Japan not surrendered after the bombing of Hiroshima and Nagasaki, it might have seen action in the Invasion of Japan. The weapon was a bullpup rifle firing .30-06 round from a 20-round magazine with a rate of fire of 650-700 RPM.
OSS Pistol Glove
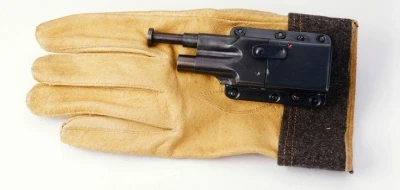

- Speed/Damage Model: Fast/High (Fast/Low during cooldown
- Type: Pistol-Glove (Melee)
An unusual weapon designed by the American Office of Strategic Services, the Pistol Glove was designed as a close-combat weapon consisting of a glove with an attached .38 caliber pistol barrel activated by a button on the front of the glove, intended to be triggered by punching the target, making it effective only for point-blank range use. The weapon will instantly kill a target at close range with a hit to the head or upper torso, but has a "cool down/reload" time of several seconds before it can be used again. If a player attempts to use the glove again before the end of the cool-down period, it will result in the player simply punching the target, doing very low damage. The weapon has a takedown animation activated if the player sneaks up on a standing enemy from behind, the player character will tap them on the shoulder, causing the opposing player to turn around, only to be punched in the face with the glove. As an Easter Egg, sometimes, when playing as a British soldier, the player character will yell "Oi, Suzy!" at the enemy during this animation, a reference to Captain MacMillan in Call of Duty: Modern Warfare, who used the same phrase to get the attention of an enemy solder, before stabbing him with a combat knife.
Bolo
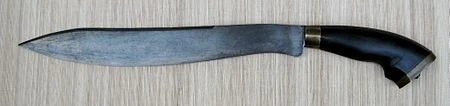

- Speed/Damage Model: Medium/Medium
- Type: Knife/Machete
The bolo is a Filipino machete-like knife with a heavy curved blade designed for chopping, intended for both mundane uses such as opening coconuts, chopping wood, and cutting brush, as well as a weapon. The weapon was used by Filipino Guerillas from the late 19th century onwards against the Spanish, Americans, and Japanese at various points in history, and bolo knives were also used by American soldiers and Marines in both World Wars as a close combat weapon.
British Army
Reused assets from previous games
- Webley Revolver
- Browning Hi-Power
- Lee-Enfield
- Ross Rifle
- Howell Automatic Rifle
- Sten Submachine Gun
- Sterling SMG
- Double-Barreled Shotgun
- Bren Gun
- Lewis Gun
- De Lisle Carbine
- Mills Bomb
Charlton Automatic Rifle
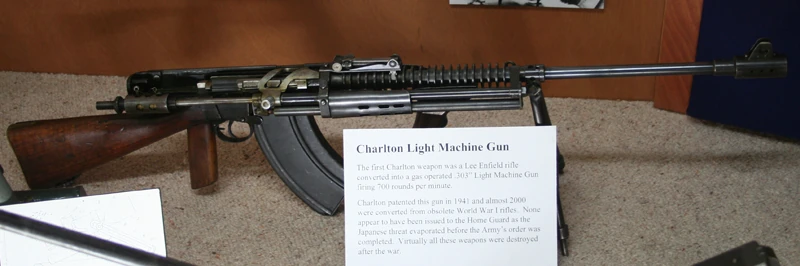

- Magazine: 30-rounds
- Caliber: .303 Enfield
- Rate of Fire: 700 RPM
- Class: Medic
- Type: Battle Rifle/LMG
The Charlton Automatic Rifle was semi-automatic battle rifle and light machine gun designed by New Zealander Phillip Charlton in 1941 for issue to the New Zealand and Australian Home Guard as a replacement the Bren and Lewis guns, which were in chronically short supply. The weapon made mostly from parts of the obsolete Lee-Metford and Magazine Lee-Enfield rifle parts. While initial designs had used a ten-round magazine similar to the Lee-Enfield, the weapon was later modified to fire from a 30-round Bren magazine attached at the bottom, giving it a similar (albeit larger) appearance to later assault rifles such as the STG-44 and AK-47. The New Zealand-build version came with a bipod and forward pistol grip.
Projector, Infantry, Anti-Tank
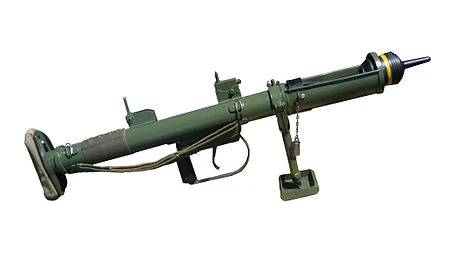

- Magazine: 1
- Caliber: 2.5 pound HEAT shell
- Class: Assault (UK)
- Type: Anti-Tank Launcher
The Projector, Infantry, Anti-Tank or PIAT was a British and Commonwealth anti-tank weapon designed as a more portable version of the earlier Blacker Bombard spigot mortar. The weapon made use of a spring with a 200-pound draw weight to activate the firing pin and trigger the propellant charge in the base of the of the shell. The spring was designed to be reset by the recoil of the weapon (though this didn't always work), but the first shot had to be primed by pulling back the spring by placing ones feet on the monopod and pulling it back similarly to how one drew a medieval crossbow. The weapon had a reputation for being difficult to use because of this, but the firepower of its shaped charge HEAT round was appreciated by troops to whom it was issued, proving capable of knocking out even the heaviest German armor at close range. The PIAT was also used against occupied buildings and positions such as machine gun nests as a sort of improvised mortar.
Boys .55 Caliber Anti-Tank Rifle


- Magazine: 5
- Caliber: .55
- Rate of Fire: Bolt-Action
- Class: Tank Hunter (UK)
- Type: Anti-Tank Rifle
The Boys Anti-Tank rifle was a .55 caliber anti-tank rifle designed by Captain H.C. Boys in 1937, and was used by British and Commonwealth troops in the early stages of World War II, as well as the Finns in the Winter War, when it's heavy .55 caliber round was capable of penetrating the armor of light tanks. Later in the war, the weapon was replaced by the PIAT, as tank armor had gotten so heavy as for the weapon to be useless against it. The Boys saw greater success in the Pacific Theater against bunkers, aircraft, and lightly-armored Japanese tanks (though there were reports of even these surviving hits from the .55 caliber round at Milne Bay and Singapore), where it saw use by both Commonwealth troops and US Marine Raiders, the latter of which destroyed multiple bunkers and shot down a seaplane with the Boys at the Battle of Makin Atoll.
Smith Gun
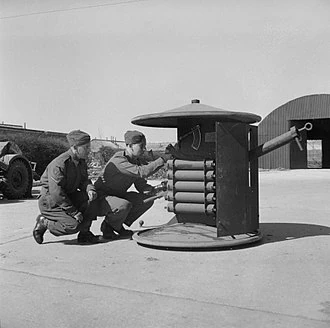

- Magazine: 1
- Caliber: 76mm/3-inch
- Type: Fixed Anti-Tank Gun
The Smith Gun was a British-designed ad-hoc anti-tank gun capable of being towed by a civilian car, designed for use by the Home Guard that first saw service in 1941. The weapons designed as an anti-tank gun capable of penetrating 60mm of armor with AP rounds, while also firing the same HE round fired from the British 3-inch mortar. The weapon initially had a "terrifying reputation for killing its crew", believed to be a result of faulty fuses in the rounds, however, after these issues were resolved, the gun later became favored by its crews and remembered as one of the best pieces of equipment issued to the Home Guard. The Smith Gun had an unconventional design where it was turned on its side to fire, one of the solid steel wheels acting like a baseplate and allowing it to be turned like a turret, and the second providing overhead cover for the crew, who were also protected by a forward plate, making a deployed Smith gun resemble a partially covered turret similar to that of the secondary armament of a First World War dreadnought.
Croft Pike


- Speed/Damage Model: Slow/High, capable of charging
- Type: Pike
The Croft Pike was a weapon consisting of an old bayonet mounted on a metal pole, intended to be issued to the Home Guard, as there were not enough firearms to arm all of them. The weapon caused uproar at the idea of the British being reduced to such a primitive weapon, thought it was defended by Lord Henry Page Croft as a silent and effective melee weapon. The pikes were replaced by the mass-produced Sten gun starting in 1942. In-game, the Croft Pike is slower to deploy than any other melee weapon, but allows the player to perform a bayonet charge even if their primary weapon is not equipped with a bayonet.
Fairbairn-Sykes Knife
- Speed/Damage Model: Fast/Low
- Type: Knife
Smatchet
- Speed/Damage Model: Medium/Medium
- Type: Knife
Red Army
Reused Assets
- Nagant M1895
- Tokarev TT-33
- Mosin-Nagant
- SVT-40
- Federov Avtomat
- PPSH-41
- PPS-42
- DP-28
- PTRS-41
AVS-36
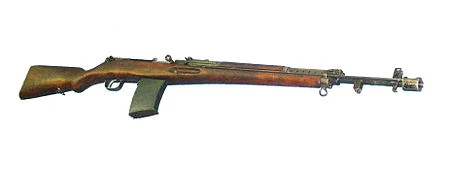

- Magazine: 30
- Caliber: 7.62x54mm
- Rate of Fire: 800 rpm
- Class: Medic
- Type: Automatic Rifle
The AVS-36 was a Soviet automatic rifle designed by Sergei Simonov, designer of the SKS rifle. The weapon was approved for service in 1936, and first saw action at the 1939 Battle of Khalkin Ghol, and later in the Winter War. The weapon performed poorly in those battles, and there were frequent complaints of malfunctions of the overly complex mechanism and even the grease on the rifle freezing solid in cold climates. As such, use was discontinued by 1942, replaced with the slower-firing, but simpler bolt-action Mosin-Nagant or the semi-automatic SVT-40. In-game, it represent a relatively high rate of fire automatic rifle, but it's accuracy at a distance suffers from high recoil.
RPD


- Magazine: 100
- Caliber: 7.62x39mm
- Rate of Fire: 650 rpm
- Class: Support
- Type: Light Machine Gun
The RPD was a Soviet light machine gun designed by Vasily Degtyaryov and the first weapon developed for the 7.62x39mm Soviet round. The weapon was first produced in 1944, though it wasn't commonly deployed until 1953. The weapon fired from a 100-round non-disintegrating belt at a rate of fire of 650 rpm, and was light enough to be carried by a single soldier. In this sense, the RPD can be seen as the predecessor of the modern squad automatic weapon. In-game, the RPD is a large-capacity light machine gun most effective when employed on a bipod from a stationary position.
RPG-1 (Unthinkable DLC)
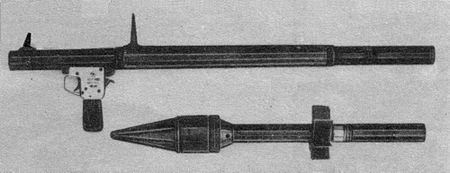

The RPG-1 was the first of the legendary Soviet RPG series of rocket launchers, which would later become known in the West by the backronym "rocket propelled grenade". The RPG-1 was designed to combine the best features of the American Bazooka and the German Panzerfaust, specifically the reusable launcher of the Bazooka and the ease of use of the Panzerfaust. Ultimately, the weapon was discontinued due to unreliable firing mechanisms and low armor penetration, but would be replaced in 1949 by the RPG-2, a weapon with the same basic design as the RPG-1 (technically the picture is an RPG-2 due to lack of images), but with improved performance. The RPG-2 would see use in the Vietnam War and later conflicts and serve as the basis for the RPG-7. In-game, the RPG-2 will replace other anti-tank launchers (Bazooka for US, Panzerschreck for Germany etc) when playing as the Soviets, and have comparable performance.
AK-1/AK-47 prototype (Unthinkable DLC)
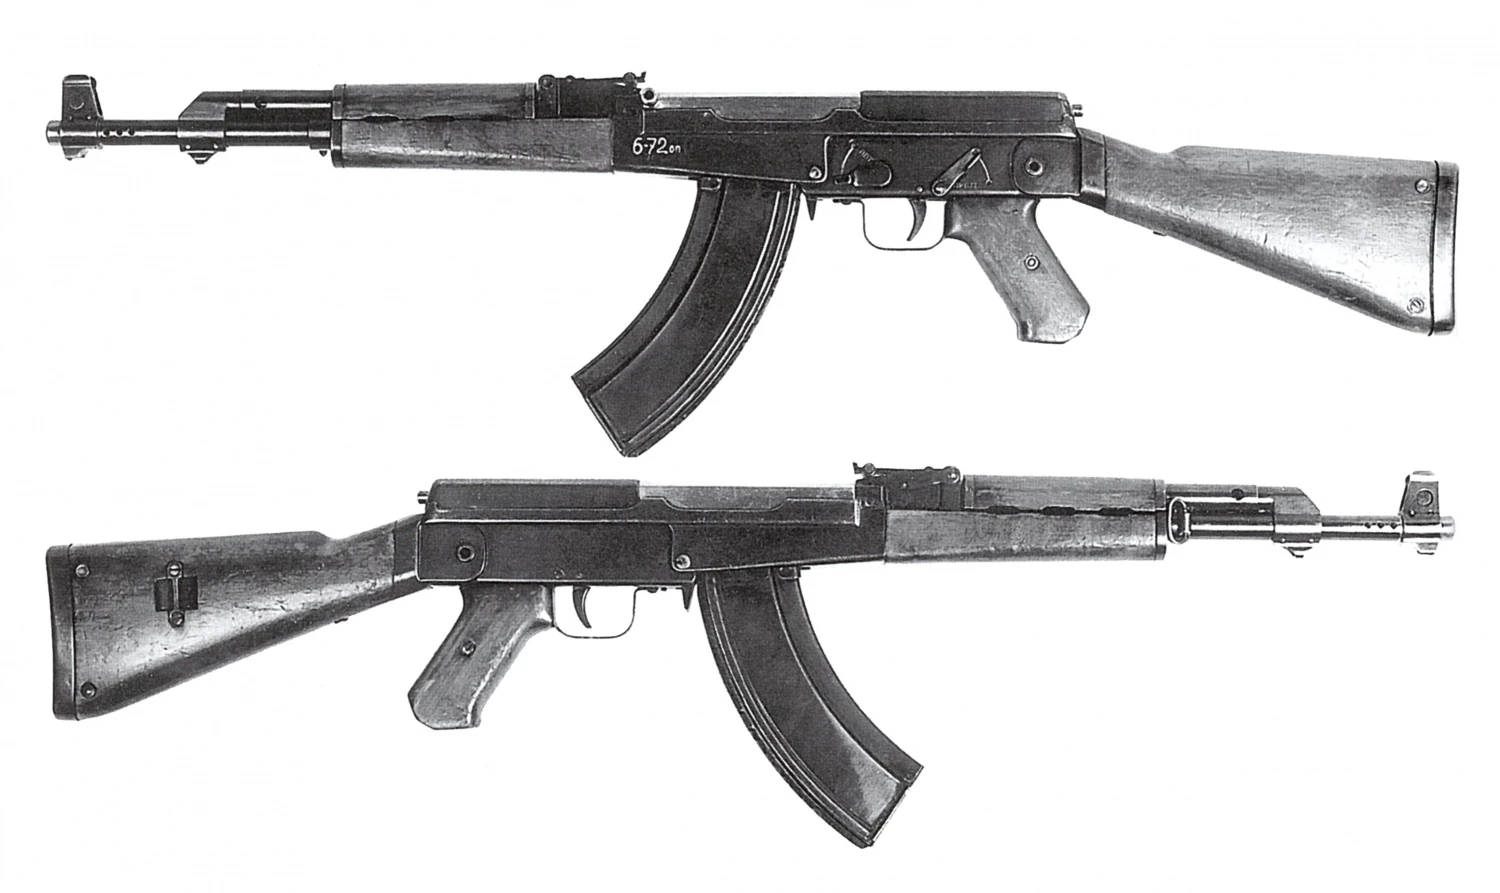

- Magazine: 30
- Caliber: 7.62x39mm
- Rate of Fire: 600 rpm
- Class: Medic
- Type: Assault Rifle
The origins of the AK-47 assault rifle began in the Second World War, when while recovering from a shoulder he received in 1941, Mikhail Kalashnikov began work on a simple to produce, easy to use automatic weapon. While initially designing a submachine gun and a light machine gun, Kalashnikov designed a new weapon starting 1944 to use the new 7.62 x 39mm cartridge, creating a weapon with a similar gas operation to the SKS rifle. While his first design lost out the SKS is 1945, but in 1946, he entered an improved design into the design competition for a new assault rifle similar to the German STG-44, with two prototypes, the AK-1 and AK-2. After further improvements designed by Kalashnikov's assistant, Aleksandr Zaitsev, the AK-47 was approved for mass production in 1947 and officially adopted by the Red Army in 1949. In-game, the weapon represents a sort of close to mid range "all-rounder" weapon, with a lower rate of fire than the AVS-36 or Sieg rifles, but greater accuracy.
Taiga Survival Knife
- Damage Model: Medium/Medium
- Type: Knife/Machete
The Taiga knife, also known as the Soviet Machete, is a knife with a length of about 12 inches and a heavy blade for chopping, with a saw on the back. The knife is intended to be capable of filling the functions of a hatchet, a knife, and a saw.
MPL-50
- Damage Model: Slow/High
- Type: Entrenching Tool
The MPL-50, also known as the saperka is a Russian Entrenching Tool that was used from the late 19th century until today, first by the Russian empire and later the Soviets. The tool consists of a simple steel spade with a short handle, intended primarily for digging fighting positions, but it can also be used as a melee weapon, particularly when one or both sides of the blade are sharpened.
Armia Krajowa/Polish Resistance (Unthinkable DLC)
Reused Asset
- Vis Pistol
- Kbk Wz. 28
- Blyskawica
Bechowiec-1
Pattern 4 Flamethrower
Filipinka Grenade
Unaffiliated/Other
This section consists mostly of melee weapons and some explosives not associated with a single faction.
Melee
- Trench Knife
- Machete
- Meat Cleaver
- Broken Bottle
- Trench Club
- Spiked Club
- Barbed Wire Club
- Flanged Mace
- Hatchet
- Pickaxe
- Crowbar
- Prybar (BF1 model)
- Saber
- Billhook
- Entrenching Tool
- Wrench (doubles as repair tool)
- Push Dagger
Explosives
- Satchel Charge
Vehicles
The following new vehicles are added by the DLC, in addition to previously existing models.
Wehrmacht
Reused Assets
- Hanomag half-track
- Panzer IV
- Ausf F (Infantry Support Variant)
- Ausf H (Tank Hunter Variant)
- Wirbelwind (Anti-Air Variant)
- Me-109
- Ju-87 Stuka
- Ju-88
Panzer 38t
- Armament: Variable main gun (see variants), MG34 machine gun
- Crew: 1
- Variants: Close Support: 37mm main gun, Tank Hunter: non-traversing 75mm gun (Hetzer), Anti-Air: 20mm AA gun (Flakpanzer 38t)
- Armor: Medium
- Speed: Medium
The Panzer 38t was originally a Czech light tank, large numbers of which were seized by the Germans when they annexed Czechoslovakia. The vehicle was armed with a 37mm Skoda gun as standard, proved an effective early-war light tank in the invasions of Poland and France, however, by 1942, the tank had become obsolete in the face of heavier Soviet armor such as the T-34. The 38t was also used by Sweden, Switzerland, Romania, and Peru among other countries.
Sturmgeschütz III
- Armament: Variable main gun (see variants), MG34 machine gun
- Crew: 1
- Variants: Assault Gun (75mm Howitzer), Tank Hunter (75mm long-barreled gun), Howitzer (105mm heavy howitzer)
- Armor: Heavy
- Speed: Slow
The Sturmgeschütz III was a German assault gun of World War II based on the chassis of the Panzer III tanks, first seeing service in 1940. The earliest models were armed with a short-barreled 75mm howitzer, intended for use as mobile artillery against bunkers and fortified positions. Later in the war, versions of the StuG III armed with a high-velocity 75mm gun designed for destroying tanks. Versions with heavier guns, including 105mm and 150mm calibers were also designed. In-game, the assault gun version has increased damage against infantry and higher blast radius, but lower damage to armor, while the Tank Hunter variant carries the high-velocity gun with a lower blast radius, but greater damage to tanks. The Howitzer version has a heavy howitzer with high damage and blast radius, but shorter range.
Jagdtiger (Unthinkable DLC)
- Type: Tank Destroyer
- Armament: 128mm main gun, MG-42 machine gun
- Crew: 2 (Driver, MG Gunner)
- Armor: Very Heavy
- Speed: Very Slow
The Jagdtiger was a tank destroyer fielded by the Wehrmacht late in World War II which, while it carried heavy armor and a 128mm main gun capable of knocking out any Allied tank, the vehicle's engine was underpowered for its weight, and thus was prone to mechanical failure. Only two battalions were ever equipped with the vehicle, the 512th and 653rd Heavy Panzerjager Battalions, the former of which was commanded by Tiger tank ace Otto Carius. A few of the vehicles were captured, mostly by the Western Allies, but also four by the Soviets. Had Operation Unthinkable occurred, the Allies would have likely had to throw everything they had at the Soviets, possibly including captured German hardware such as the Jagdtiger. In-game, a Jagdtiger crewed by re-armed ex-Wehrmacht will act as the Allied heavy tank destroyer instead of the usual Tortoise or T-28 on the Linz map, representing the 653rd Battalion, most of which surrendered to the US Army.
Landkreuzer P-1000 Ratte (Wunderwaffe DLC)
- Type: Super-heavy Tank/"Land Cruiser"
- Armament: 2x 280mm guns, 1x 128mm gun, 1x 20mm Flakvierling, 2x 13mm machine guns
- Crew: 4 (driver/main gunner, 128mm gunner, AA gunner, 2x MG gunners
- Armor: Very Heavy
- Speed: Extremely Slow
The Landkreuzer P-1000 "Ratte" was proposed German super-heavy tank which was never constructed, and one of the largest armored vehicle designs ever proposes, surpassed only by the P-1500 Monster, a vehicle similar to the Ratte armed with an 800m "Schwehrer Gustav" gun. The vehicle was to weigh 1000 tons, though some estimates suggest that, had it been built, it would have been far heavier. The Ratte was to be armed with two 280mm (11-inch) naval guns identical to those used on the Gneisenau-class battleships in a top-mounted turret, as well as a 128mm tank gun and multiple anti-aircraft guns and heavy machine guns. In-game, the Ratte appears on the mode "Ratte Assault", a variation on Conquest Assault in which the German side starts with a Ratte, but only one other tank and two aircraft, while the defending forces get five tanks and three aircraft.
Me-262 (Single Player)
- Type: Jet Fighter
- Armament: 4x 30mm cannon, 24 R4M rockets
- Crew: 1
- Armor: Medium
- Speed: Very Fast
Ta-183 (Wunderwaffe DLC)
- Type: Jet Fighter
- Armament: 2x 30mm cannon, 2x Ruhrstahl X-4 missile
- Crew: 1
- Armor: Medium
- Speed: Very Fast
E-Boat
- Armament: 2x torpedo tube (driver), 1x 37mm flak gun (gunner 1), 1x twin 20mm mount (gunner 2), 1x single 20mm mount (gunner 3)
- Crew: 4
- Armor: Medium
- Speed: Fast
The standard German torpedo boat of the Second World War was known as the Schnellboot (German- fast boat) or S-boot in German terminology, but referred to as an E-boat by the Allies. The vessel was a 35-meter torpedo boat powered by a diesel engine, giving it a longer range than British or US torpedo boats, and was armed with two torpedo tubes, as well as 37mm Flak cannon and three 20mm flak guns (1 twin and one single mount).
Bismarck-class Battleship
- Armament: 8x 15 inch guns, 2x AA batteries
- Crew: captain/forward gunner (Forward turrets), gunner 1 (rear main guns), 2x AA gunners (forward and rear AA batteries)
- Armor: Very Heavy
- Speed: Slow
The two Bismarck-class Battleships, Bismarck and Tirpitz were the first battleships built after the German re-armament, laid down in 1936 and launched in 1940 and 1941 respectively. The ships carried eight 15-inch guns in four twin turrets, as well as numerous secondary weapons. The ships had an overall length of 251 meters, and were capable of travelling at 30 knots. While eight such battleships were planned, only the Bismarck and Tirpitz were ever completed. Both ships were sunk in the war, the Bismarck in a battle with British naval forces in May, 1941, and the Tirpitz in an air raid by British Bombers in November, 1944.
Swiss Army
Panzer 38t
- Armament: Variable main gun (see variants), MG34 machine gun
- Crew: 1
- Variants: Close Support: 37mm main gun, Tank Hunter: non-traversing 75mm gun (Hetzer), Anti-Air: 20mm AA gun (Flakpanzer 38t)
- Armor: Medium
- Speed: Medium
The Panzer 38t was originally a Czech light tank, large numbers of which were seized by the Germans when they annexed Czechoslovakia. The vehicle was armed with a 37mm Skoda gun as standard, proved an effective early-war light tank in the invasions of Poland and France, however, by 1942, the tank had become obsolete in the face of heavier Soviet armor such as the T-34. The 38t was also used by Sweden, Switzerland, Romania, and Peru among other countries.
Renault R-35
- Type: Light Infantry Tank
- Armament: Variable main gun, 1x machine gun
- Crew: 1
- Variants: Close Support (37mm short barrel), Stand-off (37mm long barrel), Tank Destroyer (47mm gun, no turret)
- Armor: Light
The Renault R-35 was a French light tank intended to replace the First World War Renault FT. The vehicle intended as a light infantry support vehicle armed with the same 37mm main gun as the FT, however, after the gun proved to have inadequate armor penetration, some R35s were upgraded to the R40 standard, with a longer-barreled 37mm gun. The tank also saw use by the Germans after the Fall of France, who converted some into 47mm gun-armed tank destroyers, as well as the Swiss, who interned several French vehicles that fled into Switzerland.
Morane-Saulnier D-3800
- Type: Fighter
- Armament: 2x machine gun, 1x 20mm cannon (Ground Strike and Tank Hunter), variable external armament (see variants)
- Crew: 1
- Variants: Tank Hunter: 6x rockets, Ground Strike: 4x 50 kg bombs, Bomber Killer: 3x 20mm cannon, no external stores
The D-3800 was a Swiss upgrade of the French MS-406 fighter aircraft equipped with a superior engine, giving it greater top speeds, as well as Swiss-made machine guns which were more reliable at low temperatures.
Potez 630
- Type: Bomber/Heavy Fighter
- Armament: Variable forward guns and bombload (see variants), rear and ventral MG turret
- Speed: Fast
- Crew: 3 (pilot, rear gunner, ventral gunner)
- Variants: Bomber Killer (7x MG forward, 8x rockets), Level Bomber (2x forward MG, 2x 200 kg bombs, 4x 50 kg bombs), Ground Attack (2x forward 20mm cannon, 2x 50kg bombs)
Nahkampfkanone 1
Type 41 Patrol Boat
MO-05 Swiss Army Bicycle
- Type: Bicycle
- Armament: none (sidearm usable)
- Top Speed: Medium (moves faster than walking by default, can speed up at cost of stamina like sprinting)
- Crew: 1
- Armor: None
The Swiss Army has made use of bicycle infantry since 1909, and their employment continues to this day. The model of bicycle that was active during World War II was the same basic model adopted in 1909, which continued to be used, with various modifications, until 1990. The bicycle was equipped with saddle bags and mounting points for carrying a soldier's weapons, ammunition, and gear. While intended for movement from point A to point B in real life, in-game, the player can used their sidearm while riding, and killing an enemy in such a manner will unlock the achievement/trophy "Nobody Expects the Bicycle Cavalry".
Imperial Japanese Army
Reused Assets
- Type-95 Ha-Go
- G4M Betty
- Akizuki-class Destroyer
Type 97 Te-Ke
- Type: Tankette
- Armament: 37mm main gun, 7.7mm machine gun
- Crew: 1
- Armor: Very Light
- Speed: Fast
The Te-Ke was a Japanese Tankette designed from 1936-1937. The Te-Ke was unique in that, rather than a light armored vehicle with a machine gun in a forward-firing position, it was truly a miniaturized tank, complete with a revolving turret and a 37mm tank gun. The vehicle, however, was not designed to take on other tanks, but rather as a fast reconnaissance vehicle, being vulnerable to even .50 caliber heavy machine gun fire, let along proper AT weapons.
Type-3 Chi-Nu
- Type: Medium Tank
- Armament: 75mm main gun, 7.7mm machine gun x 2 (in real life, only one was fitted, second added in AA position for gameplay purposes)
- Armor: Medium
- Speed: Medium
- Crew: 2 (driver/main gunner, machine gunner)
- Variants: Support (Type 3 75mm gun), Tank Hunter (Type 5 high velocity 75mm gun), AA (fictional 20mm turret based on Type 98 AA tank- added to fit meta of other mediums having AA variant)
The Type-3 Chi-Nu was an improved version of the Type 97 Chi-Ha medium tank, with the most notable upgrade being a larger 75mm main gun, intended to give the vehicle comparable firepower to the M4 Sherman. When the tank began production in 1944, all Chi-Nus were reserved for the defense of the Japanese home islands against American invasion, and thus never saw combat. Had the invasion of Japan taken place, however, American forces would have faced counterattacks by "Mobile Shock Forces" of Chi-Nu tanks. In-game, the Support variant of the Chi-Nu has a large blast radius of its shell, but less damage to armor, while the Tank Hunter has a higher velocity, more heavily damaging to armor shell, but a lower explosive blast radius, making it roughly comparable to the standard and Firefly variants of the Sherman. The real-life tank had only one machine gun, but in-game, the Chi-Nu is given a second machine gun in an AA position controlled by a second player in order to fit with the standard meta of Battlefield series (apart from BF1) tank gameplay.
O-I Super Heavy Tank
- Type: Super Heavy Tank
- Armament: 1x 105mm Gun, 1x 47mm gun, 3x MG
- Crew: driver/main gunner, 47mm gunner, AA MG gunner
- Armor: Heavy
- Speed: Very Slow
The O-I was a Japanese design for a 120-ton super-heavy tank which was rumored to have had a single prototype built in 1943, though no known photos of the vehicle exist. The tank had two turrets, a 105mm turret to the rear of a 47mm gun turret, arranged in a superfiring position similar to the guns of a battleship. The project was scrapped after 1943 due to its being unfeasibly large. In-game, on maps where it appears, the Japanese O-I will be countered by two American M26 Pershings- with the O-I having heavier armor and more powerful guns to make it roughly evenly matched.
- Type: Self-Propelled Artillery
- Armament: 120mm main gun, 7.7mm machine gun
- Crew: 1
- Armor: Medium
- Speed: Medium
A single prototype self-propelled gun variant of the Japanese Type 97 ShinHoTo tank is known to exist. The vehicle is an unusual design which mounts a 120mm Naval gun on the rear of the tank Chassis, not unlike the British Archer tank destroyer. Little else is known about the vehicle, so much of its in-game performance is based on conjecture and modification to fit the established in-game meta. In game, it is comparable to a more powerful version of BF1s artillery truck, faster and with a larger gun than tanks, but with far lighter armor. It is an "indirect counter" to the US T28 Super Heavy Tank, with a higher speed and more powerful gun to counter the greater armor and higher shell ricochet probability of the T28. In game, it also has a single machine gun for defense against infantry.
J7W Shinden
- Type: Fighter
- Armaments: 4x 30mm cannon, variable external armament (see variants)
- Variants: Interceptor (Actually a Mizuno Shinryu- similar rocket-engine fighter, slightly faster, but armed only with 4 30mm cannon), Bomber Killer (4x 30mm cannon, 8x R4M rockets), Fighter Bomber (4x 60 kg HE bombs)
Aichi B7A Ryusei
- Type: Dive Bomber
- Armament: 2x 20mm cannon, 1x rear MG, Variable bombload (see variants)
- Variants: Dive Bomber (1x 800kg bomb), Torpedo Bomber (1x torpedo), Ground Attack (8x rockets)
- Crew: 2 (pilot, rear gunner)
- Speed: Fast
Nakajima Kikka
US Army
Reused Assets
- LVT-5
- LVT-5 Howitzer Variant
- 2.5 Ton Truck
- Jeep
- M3 Half Track
- M8 Greyhound
- M5 Stuart
- Gun Motor Carriage M8 (Fire Support Variant)
- Squeeze-bore Adaptor (Tank Hunter Variant)
- M4 Sherman
- Sherman Firefly (Tank Hunter Variant)
- Skink Anti-Air Tank (Anti-Air variant)
- M26 Pershing
- "Super Pershing" (Tank Hunter Variant)
- T25E2 (Heavy Support Variant)
- M7 Priest
- Higgins Boat
- Elco PT boat
- Fletcher-class Destroyer
- Iowa-class Battleship
T28 Super Heavy Tank
- Class: Assault Gun/Tank Destroyer
- Armament: 105mm main gun, .50 caliber machine gun
While classed as a super-heavy tank, the T28 was actually a prototype American assault gun and tank destroyer armed with a 105mm main gun and a secondary machine gun, as well as up to 12 inches of armor. While it never saw service, it was initially intended to assault the German Siegfried Line, but was not ready in time, so was later slated for possible use in the invasion of Japan. After the surrender of Japan after the atomic bombings of Hiroshima and Nagasaki, the vehicle remained a prototype until 1947, when the project was cancelled. Had the invasion of Japan occurred, however, it is quite possible that it would have seen combat.
F8F Bearcat
- Class: Fighter
- Armament: 4x 20mm cannon, variable ordnance loadout (see Variants)
- Variants: Tank Hunter (4x 5 inch rockets), Fighter-Bomber: 2x 500 lb HE bomb
The F8F Bearcat was designed as a lighter variant of the F6F Hellcat with a higher top speed and the capability operate off escort carriers, which the Hellcat lacked. The fighter arrived too late to see service in World War II, though it did see combat with the French in a Vietnam during the 1950s. Had the invasion of Japan gone ahead in 1946, however, the Bearcat would have been among the numerous Allied aircraft supporting the invasion.
SB2C Helldiver
- Class: Attack
- Armament: 2x 20mm cannon in wings, 2x .30 machine guns rear, variable ordnance (see variants)
- Variants: Dive Bomber (1x 2000 lb armor piercing bomb), Torpedo Bomber (1x torpedo), Ground attack (8x 5 inch rockets)
The Curtis SB2C Helldiver was a US Navy carrier-operated dive-bomber used by the US Navy during the latter stages in World War II. In spite of issues with higher weight and shorter range than the SBD Dauntless it replaced, the Helldiver nonetheless served during the Battles of the Phillipines, Iwo Jima, and Okinawa. Helldivers were among the aircraft responsible for the sinking of the Japanese battleship Musashi.
B-29 Superfortress
- Class: Bomber
- Armament: twin MG front, top turret, ball turret, 20mm cannon rear, variable bomb load (see Variants)
- Variants: Bombardment: 5x 2000 lb GP bomb, Firestorm: 8x Incendiary bomb, Anti-Shipping: 2x "Azon" glide bomb
The B-29 Superfortress was the largest aircraft used by the US in World War II, and had many innovative features such as a pressurized cabin and remote-control gun turrets. The aircraft was designed as a long range bomber intended to replace the earlier B-17 and B-24 bombers. The B-29 was employed late in the war in air raids against Tokyo and other major Japanese cities, as well as the atomic bombings of Hiroshima and Nagasaki. If Operation Downfall had occurred, B-29s would have been among the aircraft employed to attack Japanese defenses in preparation for the invasion.
P-80 Shooting Star
- Class: Jet Fighter
- Speed: Very Fast
- Armament: 6x .50 caliber machine guns, Variable ordnance (see Variants)
- Strike Fighter: 6x 5 inch Rockets, Fighter-bomber: 2 x 500 lb HE bomb
The P-80 Shooting Star was a jet fighter developed by the US starting 1943, which made its first flight in January, 1944. The aircraft would first be deployed operationally in Italy in the last days of World War II, though it never saw combat. The jet was intended as a counter to the German Me-262, however, it was later found to be inferior in speed and acceleration to its German rival. Had Operation Downfall actually happened in 1946, the Shooting Star may well have seen combat in the invasion of Japan.
British Military
Reused assets
- Churchill
- Spitfire
Universal Carrier
- Type: Tankette
- Armament: 1x Bren Gun, Passenger's weapons
- Armor: Very Light
- Speed: Fast
- Crew: 4 (driver, gunner, passenger x2)
The Universal Carrier was a British-designed light-armored vehicle based on the earlier Carden-Loyd Tankette, intended as a personnel and weapons carrier typically armed with a Bren gun, to the point that they were often known as Bren gun carriers, though they also carried numerous other weapons. The Universal Carrier was widely by the British and dozens of other nations, with numerous being captured and used by the Germans, hence its appearance on the German side as well in-game.
Armadillo Armored Truck
- Type: Armored Truck/Armored Personnel Carrier
- Armament: 37mm gun, Lewis Gun
- Armor: Light
- Speed: Fast
- Crew: 6 (driver, gunner, 4x passenger)
Covenanter Tank
- Type: Light Tank
- Armament: Variable main gun, Besa machine gun
- Variants: 2 pounder gun (Infantry Support), 2 pounder with Littlejohn adaptor (Tank Hunter), 75mm Howitzer (Howitzer)
- Armor: Medium
- Speed: Medium
- Crew: 1 (driver/gunner)
Matilda
- Type: Infantry (Medium) Tank
- Armament: Variable main gun, Besa machine gun, AA .50 machine gun (not standard in real-life, but added to balance against other medium tanks)
- Variants: 2 pounder gun (Tank Hunter), 75mm Howitzer (Close Support), Anti-Air (looks like a Matilda I, but the machine gun acts as autocannon- to fit meta of other mediums having AA variant)
- Armor: Medium
- Speed: Medium
- Crew: 2 (driver/gunner), MG gunner
TOG-2 (Single player only
- Type: Heavy Tank
- Armament: 17 pounder gun, Besa MG
- Armor: Heavy
- Speed: Slow
- Crew: 1/Single Player only
Tortoise A39 (Unthinkable DLC)
- Type: Assault Gun/Tank Destroyer
- Armament: 94mm main gun, Besa machine gun ball mount, 2x Besa MG turret
- Armor: Heavy
- Speed: Very Slow
- Crew: 2 (driver, MG gunner)
The Tortoise A39 was, similar to the US T-28, in truth, more of an assault gun or tank destroyer armed with a 94mm/32-pounder high-velocity main gun in a casemate mount, the tank was designed to assault the Siegfried line.
Handley Page Halifax
- Type: Bomber
- Armament: Variable bombload, multiple twin MG (front, top turret, bottom turret, tail)
- Variants: Bombardment (5x 2000 lb bomb), Firestorm (8x incendiary bomb), Block Buster (1x block buster bomb)
- Armor: Medium
- Speed: Slow
- Crew: 5 (pilot, 4x gunner)